
Free Pattern
Step-by-Step
Crochet
AccessoriesNavy nautical crochet platform wedge sandal straps
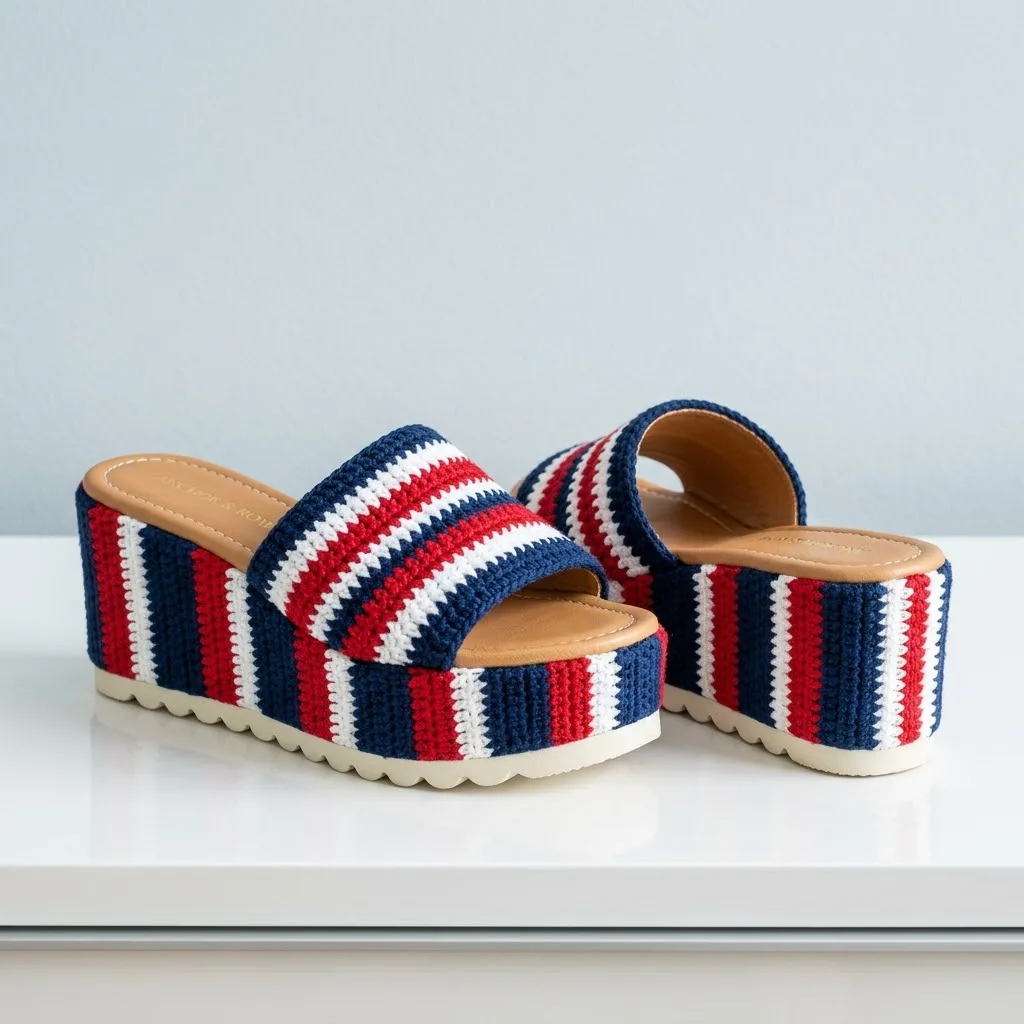
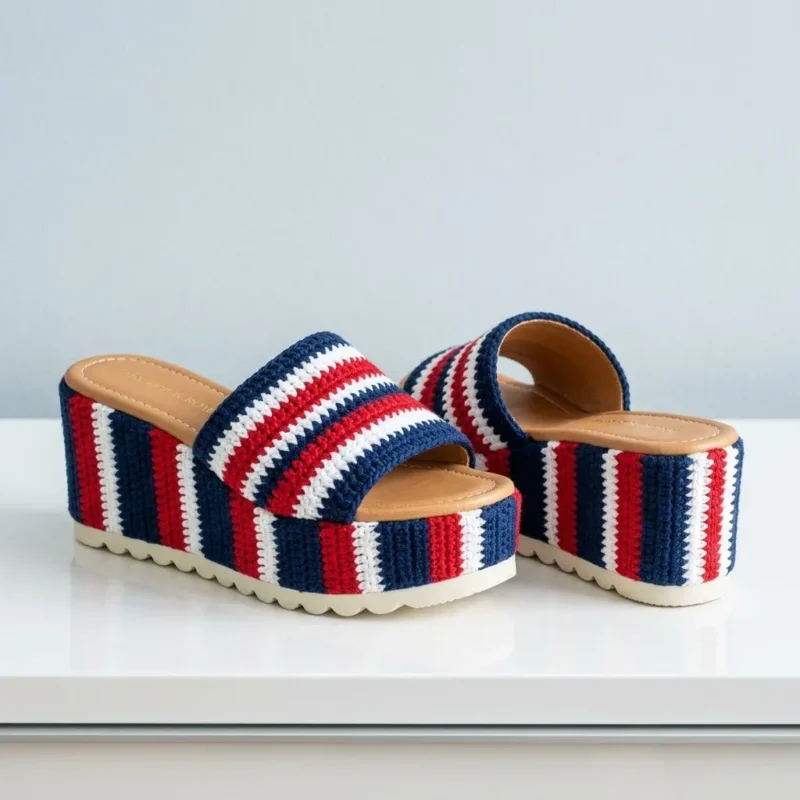
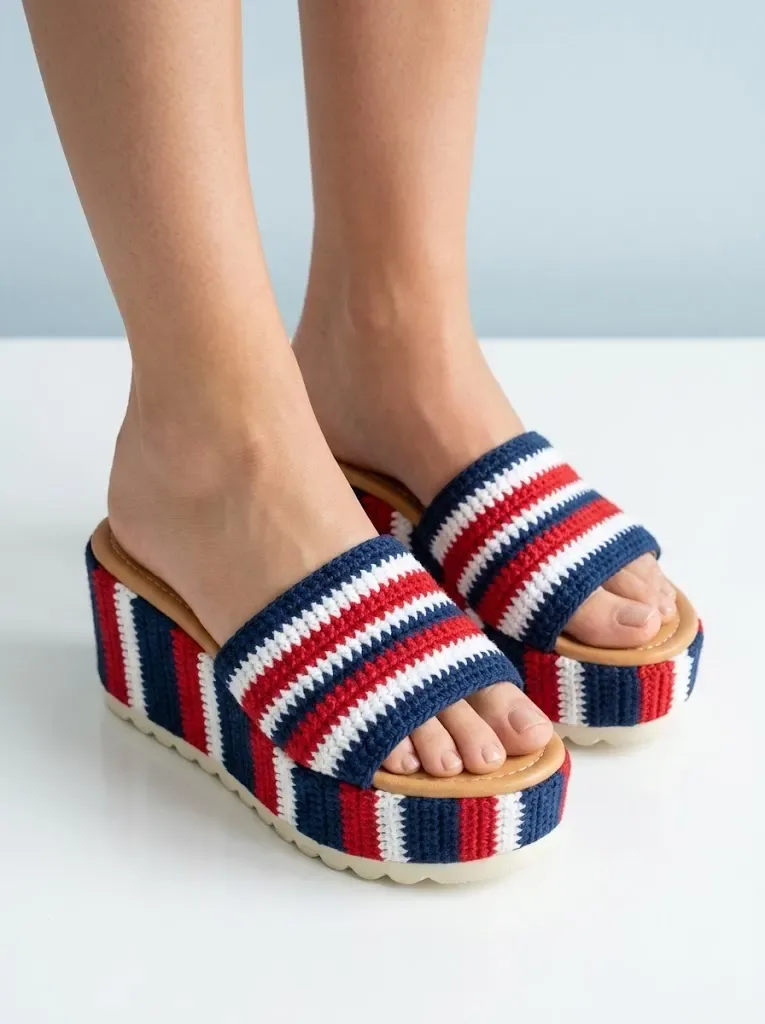
I crochet striped navy, white, and red straps for platform wedge sandal blanks.
- Level
- Intermediate
- Time
- 4-6 hours
- Hook
- 4.0 mm
- Yarn
- Worsted
Pattern highlights
- Chain a foundation row and single crochet across to set the strap width before any striping starts.
- Work the toe strap in back loop only for several rows, changing color at the end of each stripe block.
- Work the wider strap across both loops instead, following the same navy, white, red stripe sequence.
- Change colors by finishing the last stitch of a row with the new yarn before turning.
- Weave in every color-change tail once both strap pieces are complete.
- Position each finished strap on the sandal blank and pin it before any gluing.
- Attach both straps to the platform sandal blank with fabric glue or E6000 adhesive.
About This Pattern
I keep a folder for footwear patterns, and it stays thin. Most crochet collections lean toward hats and blankets, so a shoe pattern earns its spot. This one sits at the edge of wearable crochet, closer to accessory-making than garment work, and it asks for a different kind of patience than a sweater does.
The technique here is plain single crochet worked flat, but the striping does the real work. One strap goes back loop only for a ridged look, the other works straight across for a smoother band. Color changes happen at the end of a row, which keeps the stripes crisp instead of blurred.
The finished object is two crocheted straps meant to be glued onto purchased sandal blanks, not a whole shoe built from scratch. That distinction matters. I'm making the visible part, the part people notice, while the blank does the structural job of holding a foot off the ground.
Worth knowing
There's something satisfying about a pattern with a clear stripe formula: navy, white, red, white, repeating down the row. It reads like a code once you've made the first few color changes. The back-loop-only toe strap gives one piece texture without any stitch count changing, which feels like getting detail for free. Nothing here increases or decreases, so the whole project is a steady rhythm of turning and counting stitches across, not shaping. That makes it a good project for watching something else while you work. The payoff is a pair of straps that look store-bought once they're glued to a blank, which is a nice trick for so little actual stitchery.
Common mistakes
- Crocheting into both loops on the toe strap Check that you're working back loop only on every row of that strap, or the ridged texture disappears.
- Starting chain too short or too long Measure your specific sandal blank's toe area before chaining, since blanks vary by brand and size.
- Using acrylic yarn instead of cotton Stick with mercerized cotton, since acrylic pills and wears out faster under foot friction.
- Gluing before checking fit Pin the straps in place and try the blank on before applying adhesive, since glue is permanent.
Intermediate
Progress Tracker
0 of 0 rounds
Tap a round to tick it off — your place is saved on this device.
The kit
Yarn
- Worsted weight cotton yarn (I recommend 100% mercerized cotton for durability and sheen)
- Why cotton? Cotton yarn holds its shape beautifully, doesn’t stretch out with wear, and can be spot cleaned easily. Mercerized cotton has a slight sheen that elevates the finished look. Avoid acrylic for this project as it tends to pill and won’t hold up to the wear and friction of footwear.
Navy blue
- approximately 150 yards
Cherry red
- approximately 100 yards
Bright white
- approximately 75 yards
Hook
- 4.0mm (G/6) crochet hook
Additional Supplies
- Platform sandal blanks (available at craft stores or online shoe supply retailers)
- Fabric glue or E6000 adhesive
- Tapestry needle for weaving ends
- Scissors
- Measuring tape
- Straight pins or clips for positioning
- About Platform Sandal Blanks: Look for foam platform sandals with a smooth surface and a leather or faux leather footbed. The platform should be approximately 2 inches high. Many craft suppliers sell unfinished platform bases specifically for customization projects like this one.
Gauge
- 18 stitches and 20 rows = 4 inches in single crochet
Starting with Navy
Platform Side Panels (Make 4 total, 2 per sandal): The vertical stripes on the platform are created by working in rows and changing colors. Each panel wraps around one side of the platform base.
Color Sequence: Navy, White, Red, White, Navy, White, Red, White, Navy. This nine-stripe sequence creates the balanced nautical look. You’ll repeat this sequence as needed based on your platform’s circumference.
Starting with Navy:
Row 1Ch 12, sc in second ch from hook and in each ch across, turn. (11 sc)
Row 2Ch 1, sc in BLO of each st across, turn. (11 sc)
Rows 3–4Repeat Row 2. (11 sc) Change to White at the end of Row 4 by completing the last yarn over of your final stitch with the new color.
Rows 5–6With White, ch 1, sc in BLO of each st across, turn. (11 sc) Change to Red.
Rows 7–10With Red, ch 1, sc in BLO of each st across, turn. (11 sc) Change to White.
Rows 11–12With White, ch 1, sc in BLO of each st across, turn. (11 sc) Change to Navy.
Rows 13–16With Navy, ch 1, sc in BLO of each st across, turn. (11 sc) Continue this stripe sequence until your panel measures approximately 6 inches wide (or half the circumference of your platform base).
A note on measuring:
Wrap your panel around one side of the platform as you work. The fabric should fit snugly without stretching or bunching. Add or subtract rows as needed for your specific sandal size.
Fasten off and weave in all ends securely. Loose ends can work themselves free with wear, so take extra care here.
With Navy
Toe Strap Panels (Make 2 total, 1 per sandal): The toe strap features horizontal stripes and a slightly different construction to create that wide band that sits across your foot.
Color Sequence for Toe Strap: Navy, White, Red, Red, White, Navy
With Navy:
Row 1Ch 31 (or enough to span across the width of your sandal’s toe area plus 1 inch on each side for attachment), sc in second ch from hook and in each ch across, turn. (30 sc)
Rows 2–4Ch 1, sc in each st across, turn. (30 sc) Change to White.
Rows 5–6With White, ch 1, sc in each st across, turn. (30 sc) Change to Red.
Rows 7–10With Red, ch 1, sc in each st across, turn. (30 sc) Change to White.
Rows 11–12With White, ch 1, sc in each st across, turn. (30 sc) Change to Navy.
Rows 13–16With Navy, ch 1, sc in each st across, turn. (30 sc) Fasten off and weave in all ends.
The finished toe strap should measure approximately 6.5 inches long and 3 inches wide. This creates a substantial band that sits comfortably across the top of your foot.
Sizing adjustment tip:
For smaller feet, reduce your starting chain by 4-6 stitches. For larger feet, add 4-6 stitches. The strap should wrap from one side of the footbed to the other with about an inch of overlap on each side for secure attachment.
Hook
4.0mm (G/6) crochet hook
Gauge and Sizing
Gauge: 18 stitches and 20 rows = 4 inches in single crochet
Checking your gauge matters for this pattern because the crocheted panels need to fit snugly around your specific sandal base. Too loose and the fabric will look sloppy. Too tight and you won’t be able to wrap it smoothly.
Sizing: This crochet pattern is written for a women’s size 7-8 sandal base. I’ll include notes throughout for adjusting to smaller or larger sizes.
Stitches Used in This Pattern
Chain (ch): The foundation stitch. Yarn over, pull through the loop on your hook. This creates the starting row for most crochet projects.
Single Crochet (sc):
Insert your hook into the stitch, yarn over and pull up a loop (two loops on hook), yarn over and pull through both loops. This creates a tight, dense fabric perfect for structured projects.
Slip Stitch (sl st):
Insert hook into stitch, yarn over and pull through both the stitch and the loop on your hook in one motion. Used primarily for joining and finishing.
Back Loop Only (BLO):
Instead of inserting your hook under both loops at the top of the stitch, you only go through the back loop. This creates the ribbed texture you see on the platform panels.
From the collection
Finishing
- This is where pieces transform into actual wearable sandals. Take your time here. Rushing the assembly can affect both the look and the durability of your finished shoes.
- Clean the surface of your platform sandal blanks with a damp cloth to remove any dust or residue. Allow to dry completely. If your blanks have a smooth or slippery surface, lightly sand them with fine-grit sandpaper to help the adhesive bond better.
- Working with one sandal at a time, position your crocheted side panels around the platform edge. The panels should meet at the back (heel area) and front (toe area) of the platform. Use straight pins or clips to hold them in place while you check the fit. Apply a thin, even layer of fabric adhesive to the back of one panel. Press firmly against the platform, smoothing out any bubbles or wrinkles. Hold in place for 30-60 seconds until the initial bond sets. Repeat with the second panel on the opposite side. Where the panels meet, apply a small amount of adhesive to join the edges together seamlessly. Allow to cure for at least 2 hours before moving to the next step.
- Position the toe strap across the front portion of the sandal, approximately 1-2 inches back from the toe edge. The strap should curve slightly to follow the natural shape of your foot. Fold the side edges of the strap under the footbed and secure with adhesive. You may also hand-stitch through the strap and into the footbed material for extra security if your sandal base allows. Apply adhesive along the bottom edge of the strap where it meets the platform to create a clean, finished look.
- Allow your completed sandals to cure for 24 hours before wearing. This ensures all bonds are fully set and your sandals will hold up to regular use.
Why it works
The toe strap is worked in back loop only across every row, which raises a ridge that reads as texture rather than shaping.
The wider strap is worked flat with no back-loop instruction, giving it a smoother, denser surface suited to a broader band.
Neither strap increases or decreases; the finished width comes entirely from the starting chain, and every row after just repeats it straight across.
Color changes are placed at the end of a row and completed on the last yarn over, so the join sits at the strap edge instead of mid-row.
What it becomes
- A pair of finished sandals for warm-weather days, paired with cropped pants or a simple sundress.
- A gift for a crocheter who collects wearable projects rather than the usual amigurumi or blankets.
- A boardwalk or patio accessory, worn with linen separates for an easy, low-key outfit.
Original pattern: https://crochetwithmia.com/classic-navy-nautical-crochet-platform-wedge-sandals-pattern/
FAQ
Do I need to buy special sandal blanks?
Yes, this pattern attaches crocheted straps to purchased platform sandal blanks rather than building a sole from scratch. You'll find them at craft stores or online shoe supply retailers.
Why cotton yarn instead of acrylic?
Cotton holds its shape and resists stretching under the friction of walking. Acrylic tends to pill faster in footwear, which is why it's not recommended here.
Can I change the stripe colors?
The pattern uses navy, white, and red for a nautical look, but the stripe structure would hold with any three colors. Just keep the color changes at the row ends as written.
Is back loop only hard to keep track of?
It just takes attention on the toe strap rows, since the wider strap doesn't use it. Marking your first stitch of each row can help you stay consistent.