Free Pattern
Step-by-Step
Crochet
Bags & AccessoriesOval crochet bag with a crab stitch rose lid
An oval crochet bag with a mega rose lid worked in crab stitch, plus lining steps.
- Level
- Intermediate
- Time
- 4-6 hours
- Hook
- 25 mm
- Yarn
- Bulky
Pattern highlights
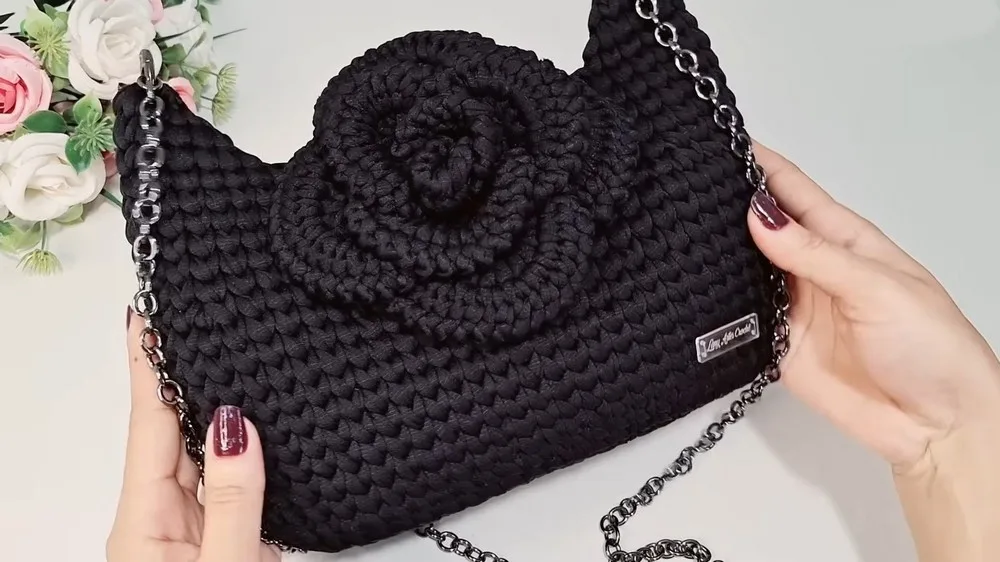
- Start the Mega Rose separately with the finer yarn, building it outward in hdc rounds from a magic ring.
- Edge the finished rose in crab stitch so the petals get that reversed, corded look.
- Build the oval base from a foundation chain, working tightly along both sides to keep it firm.
- Continue upward from the oval into the straight sides and corner shaping of the bag.
- Cut and sew the silk lining separately, then hand stitch it into the bag just below the opening.
- Finish by attaching the rose to the flap, adding magnetic closures, and sewing on the chain strap and rings.
About This Pattern
This is the kind of project that sits at the top of a bag-making folder, the one you point to when someone asks what crochet can actually carry. It combines shaping, a fussy decorative element, and finishing work that borders on garment construction. I keep coming back to patterns like this because they refuse to stay purely decorative.
The techniques here are worth naming. There is an oval base built from a foundation chain worked in back loops, a rose lid grown from a magic ring in escalating rounds, and crab stitch, which is just single crochet worked backward. Add lining sewn in by hand and magnetic closures set into the flap, and you have a piece that borrows from garment sewing as much as from crochet.
What comes out the other end is a structured oval bag, the kind that holds its shape empty. The Mega Rose sits on the flap like a closure that forgot to be practical. Silk lining, a metal chain strap, and hardware turn a crochet project into something closer to an accessory you'd buy.
Worth knowing
The satisfaction here is in the contrast. The bag body is plain, disciplined single crochet worked tightly for firmness, row after row until the oval holds its shape. Then the rose interrupts that discipline entirely, spiraling out in hdc increases finished with a reverse crab stitch edge that catches light differently than regular stitches. Lining the bag by hand, pinning it in place and sewing just below the opening, is quietly satisfying too. It is the part most patterns skip and this one insists on. By the end you have used a magic ring, a foundation chain, increases, crab stitch, and hand sewing in a single object. Not many patterns ask for that range.
Common mistakes
- Working the oval base too loosely Keep the single crochets along the foundation chain tight, since the pattern calls for firmness in the base. A loose oval will not hold the bag's shape.
- Skipping the 3-sc curve at the chain tip That cluster of three stitches is what turns a flat chain end into an oval curve. Leave it out and the base ends in a point instead.
- Confusing crab stitch with regular single crochet Crab stitch is worked left-to-right, the reverse of standard direction. Turn your hand orientation deliberately or the texture will look identical to regular sc.
- Not checking stitch counts after rose increases Each round of the Mega Rose roughly doubles stitches through hdc increases. Miscounting early carries through every later round, so check before moving on.
- Sewing lining before the bag shape is finalized Lining goes in after the crochet body and corner shaping are complete. Adding it early makes it hard to adjust fit.

Intermediate
Progress Tracker
0 of 0 rounds
Tap a round to tick it off — your place is saved on this device.
The kit
Yarn for Main Bag
- 25 mm Premium knitted yarn (approx. 2 skeins)
Yarn for Mega Rose
- 15 mm finer knitted yarn OR use bag yarn, 3mm/5mm polyester cord, or desired equivalent (stretch thinner if needed)
Main Bag Hook
- 5.0 mm crochet hook
Rose Hook
- 3.5 mm crochet hook
Bag Lining
- Silk or similar lightweight fabric (approx. 42 x 24 cm for lining, plus extra for Rose)
Magnetized Buttons
- 2, for flap closure
Chain Strap
- Metal, 1 m long
Articulated Rings
- 2, 25 mm diameter
- Scissors
- Tapestry Needle
- Measuring Tape
Markers
- Optional for corner shaping
- Pins/Clothespins: For securing lining
Mega Rose Lid
Base: With finer yarn and 3.5mm hook (or use main yarn, stretch thinner), create magic ring.
Round 1Ch 2, work 11 hdc in ring (counting ch). Pull to close, sl st to 2nd ch.
Round 2Ch 2, 2 hdc in each st (24 hdc), sl st to 2nd ch.
Round 3Ch 2, hdc in next st, 2 hdc in next st alternately (taking back loop) — (36 hc), sl st to 2nd ch.
Round 4Ch 2, hdc in next 2 st, 2 hdc in next st alternately (taking back loop) — (48 hdc), sl st to 2nd ch.Fasten off, weave in ends.Petals: Attach yarn to any loop from round 1 (total 12 loops).Ch 2, 3 hdc in same loop (counting ch as first).Rep for each loop.Turn, for each petal: Ch 2, 2 hdc in each st across petal base for 12 st.Attach to fourth loop with sl st.Ch 1, Crab Stitch: Work reverse sc across each petal for decorative edging (12 sc, worked left-to-right).Attach petals as described; rep for additional rows with petals, increasing stitch count to 18, then 20 hdc per petal as described.Fasten off and weave in ends.Rose Lining: Cut circle slightly larger than Rose base; sew to back for neat finish.
Bag Body
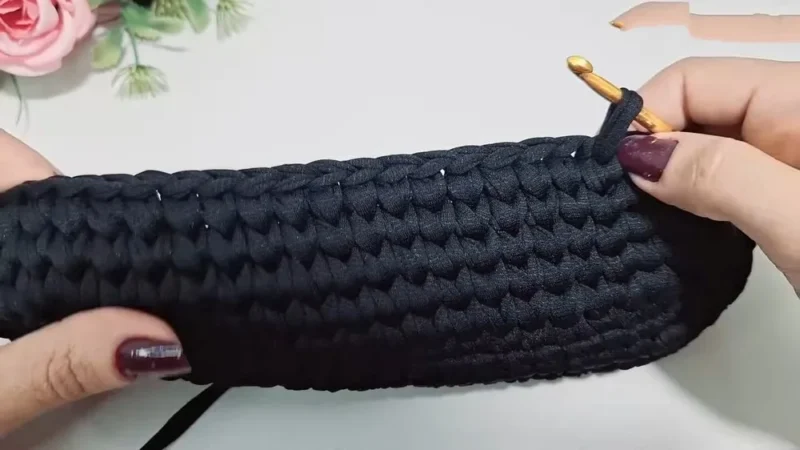
Row 1Ch 19 (count knot as first chain). Work in back loops. Skipping first ch, sc in next 17 ch (work tightly for firmness). In last ch, place 3 sc (creates curve for oval). Turn, work sc in each sc along opposite side of foundation chain (16 sc). In last sc, place 3 sc to mirror other curve. Total: 38 sts (16 + 3 + 16 + 3)
Row 2Skip closure stitch, work centered sc in each of next 16 st. At the curve, work 2 sc in each of next 3 st (6 sc total for curve). Continue sc in each st along straight, then repeat curve increases. Total: 44 sts
Row 3Sc in each of 16 st. In curve: (2 sc in next st, sc in next st) x3 (repeat for three increases with one sc between). Sc in each straight st, repeat curve formula on other end. Total: 50 sts
Row 4Sc in each of 16 st. Curve: (2 sc in next st, sc in next 2 st) x3 (repeat for three increases, two sc between). Sc in each straight st, repeat curve formula. Total: 56 sts
Rows 5–6Work centered sc in each st (56 sc per row). Bag base measures ~25 cm x 9 cm.
Row 7Sc in each of 16 st. Curve: (2 sc in next st, sc in next 3 st) x3 (repeat for three increases, three sc between). Straight: 16 sc. Repeat curve on other end. Total: 62 sts
Rows 8–14Work centered sc in each st (62 sc per row).
Optional: For visual shaping at base, use 3.5 mm hook and work 19 sl st across core of curve area, for decorative effect.
Row 15Sc in each of 16 st. Dec over next 2 st. Sc in next 8 st. Dec over next 2 st. Sc in next 19 st. Dec over next 2 st. Sc in next 8 st. Dec over next 2 st. Sc in each st to end. Total: 58 sts (after 4 decreases)
Rows 16–20Sc in each st. (58 sc per row). Piece measures ~18 cm tall, ~28 cm wide.Finishing Base: Fasten off invisibly. Tuck and trim ends.
Bag Lining
Cut silk or similar fabric, fold wrong-side out.
Position bag on fabric leaving 2 cm for seam allowances.
Sew sides with 1 cm margin.
Insert lining into bag, secure with pins/clothespins.
Hand sew lining to bag sides just below opening, using invisible stitches.
Corner Shaping
Mark Corners Fold bag flat, mark 14 st for each side corner, 15 st for each center (total 58 st).
For Each Corner: Attach yarn at central marked st.
Ch 1, sc in next 6 st (including ch).
Dec over next 2 st. sc in next 6 st .
Turn (no ch), sl st in each st except first and last st (11 sl st).
Turn, ch 1, sc in each st (11 sc).
Turn (no ch), sl st in each st except first and last (9 sl st).
Turn, ch 1, sc in each st (9 sc).
Turn (no ch), sl st in first 3 st.
Next 2 st: dec over both.
Sl st in last 3 st (total 6 st).
Fasten off, sew across to close (with tapestry needle).
Repeat for each corner.
Assembly
Step 1Attach Mega Rose petal to back of bag using 6 stitches.
Step 2Sew magnetic buttons and chain strap to bag.
Step 3Attach metal rings; sew any necessary labels.
From the collection
Finishing
- Weave in ends from both the rose and the bag body before assembly starts.
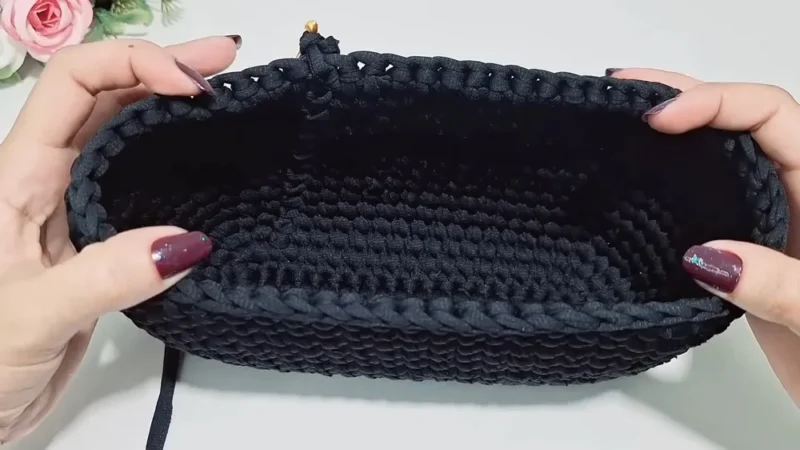
- Cut, pin, and hand sew the silk lining into the bag, securing it just below the opening with invisible stitches.
- Attach the finished Mega Rose to the flap, then sew on the magnetic closures, chain strap, and any metal rings.
Why it works
The bag body starts from a foundation chain worked in back loops, with three single crochets placed in the last chain to curve the tip into an oval rather than a point.
The Mega Rose is built flat in rounds from a magic ring, so it can be shaped and edged independently before it ever meets the bag.
Lining is added after the crochet body is complete, sewn in below the opening rather than joined mid-construction, which keeps the bag's structure intact while it is worked.
Crab stitch is worked left-to-right as a reversed single crochet, which is why it appears specifically as an edging step rather than a structural round.
What it becomes
- An everyday shoulder bag structured enough to hold its shape next to simple knitwear or a plain coat.
- A statement accessory for an outfit that needs one textured focal point, paired with solid-color clothing.
- A gift for someone who collects handmade bags, paired with a matching scarf or hair accessory in the same yarn.
Original pattern: https://redagapeblog.com/crochet-mega-rose/
FAQ
Can I use a different yarn than the premium knitted yarn listed?
Yes, the pattern notes to adjust sizing if using alternate yarn or hooks. Always check fit after the foundational rows before continuing.
What exactly is crab stitch?
It is a reverse single crochet, worked left-to-right instead of the usual direction. It gives the rose edge a corded, textured finish.
Do I need a sewing machine for the lining?
No, the notes say you can hand sew with matching thread for invisible seams. A sewing machine is only an option, not a requirement.
Why is the Mega Rose made separately from the bag?
It is worked flat in its own rounds from a magic ring, then attached afterward as a decorative lid. This lets you shape and edge it independently before final assembly.