
Free Pattern
Step-by-Step
Crochet
Sweaters & CardigansAn oversized cardigan built from slip stitch and slub yarn
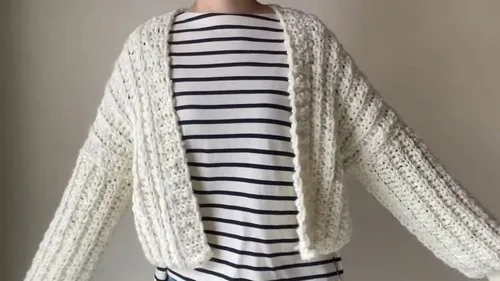
A slouchy crochet cardigan worked in slub yarn using slip stitch and back loop only.
- Level
- Intermediate
- Time
- 8-12 hours
- Hook
- 10 mm
- Yarn
- Super Bulky
Pattern highlights
- Chain a long foundation and work the first row into the back bump for a clean lower edge.
- Build the back body panel row by row, keeping every stitch in the back loop only.
- Shape the neckline and shoulders near the top by working partial rows instead of full ones.
- Seam the sleeves to the body once the body panel and both sleeves are finished.
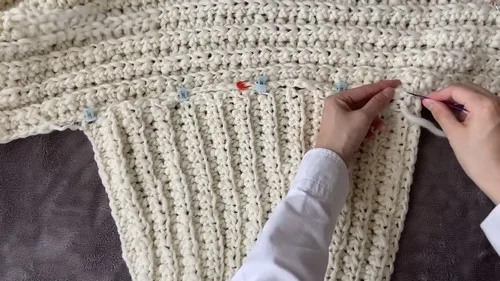
- Work the edging strip separately, joining it into the body's edge as you go.
- Carry the edging around the front, across the back neck, and down the other side, reducing bulk at the V-neck corners.
About This Pattern
I keep a shelf for pieces that lean into texture instead of stitch count. This cardigan belongs there. It's built from one long slub yarn, the kind that bumps and thins on its own schedule, so no two rows ever look quite identical. I like collecting patterns that trust the yarn to do the pattern's job. This one hands over most of the visual interest to fiber, not technique, and that's a rare thing to find written down.
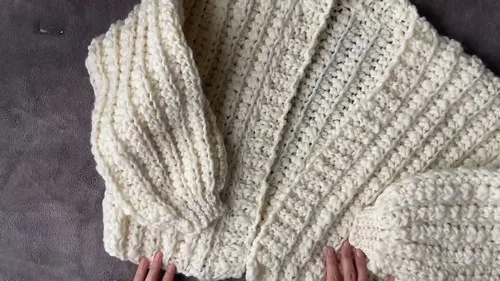
What comes off the hook is a dropped-shoulder cardigan with a V-neck, built in three flat pieces plus a long edging strip. The body panel shapes its own neck and shoulder with partial rows near the top. Sleeves seam in afterward. The edging travels up one front, around the back neck, and down the other side, joined stitch by stitch as it goes. It reads oversized, slouchy, and deliberately unfinished-looking in the best way.
Common mistakes
- Working the wrong loop This pattern stays in the back loop only for almost every row. Check each row's instruction before diving in, since one row worked in both loops will flatten the ridge.
- Skipping the back bump start The foundation row is worked into the back bump of the chain, not the usual top loop. Missing this changes the look of the bottom edge and can throw off the count.
- Rushing the partial rows The neck and shoulder shaping stops short of the row's end on purpose. Counting carefully here matters more than anywhere else in the piece.
- Treating the edging as an afterthought Part 3 joins into the body edge as it's worked, not after. Crocheting the whole strip first and sewing it on later will change how it sits.

Intermediate
Progress Tracker
0 of 0 rounds
Tap a round to tick it off — your place is saved on this device.
The kit
- Yarn Yanagiya Milky Slub or similar bulky or super bulky slub yarn
- 10mm crochet hook
- 7mm crochet hook
- Tapestry needle
- Scissors
Main Pattern
Round 1Foundation Chain 1 Work into the back bump of the chain Sl St w YO in the second back bump from hook and next 2 stitchesHDC in the next 71 stitches Sl St w YO in the last 3 stitches
Round 2Chain 1 and turn Sl St w YO in BL Only for first 3 stitches HDC in BL Only for next 71 stitchesSl St w YO in BL Only for next 2 stitches Sl St w YO into the full stitch head of the last stitch Repeat Repeat Row 2 until you have 13 rows totalShaping the Neck and Shoulder Right Side Row 14 Partial Row Work in pattern and stop after 37 stitches
Round 15to 20 Shoulder Section Turn at the 37th stitch Single crochet in BL Only then chain 1Continue working the pattern over 37 stitches only Work a total of 7 rows for this section Rejoining the Body Left Side
Round 21Chain 41 stitches Work into the back bump of the chain Sl St w YO in second back bump and next 2 chainsHDC in back bump of remaining 37 chains Continue working across the remaining 37 stitches of the bodyRows 22 to 33 Continue the full 77 stitch pattern for 13 more rows Finish Fasten off and set body panel aside Part 2 The Sleeves Make TwoStarting Chain Using 10mm hook chain 36 stitches
Part 2
Round 1Foundation Switch to 7mm hook Chain 1 and work into the back bump Slip stitch in second back bump and next 5 stitchesSwitch to 10mm hook HDC in remaining 30 stitches
Round 2Chain 2 and turn HDC in BL Only for 30 stitches Switch to 7mm hook Slip stitch in BL Only for next 5 stitchesSlip stitch into full stitch head of last stitch For Row 3 Chain 1 and turn Slip stitch in BL Only for 6 stitches Switch to 10mm hookHDC in BL Only for 30 stitches Repeat Repeat Rows 2 and 3 until sleeve measures 25 rows or desired length Finish Fasten off leaving a long tail for seamingPart 3 Assembly Attach Sleeves Fold the body panel in half at the shoulders Sew the top 36 stitches of each sleeve to the bodyCenter sleeves with 18 stitches on front and 18 on back Sew Seams Fold sleeves in half Sew sleeve seams and underarm seams down the body sidesPart 4 Front Ribbing Button Band and Neckband Starting Chain Attach yarn at bottom front corner Chain 5 stitches
Part 3
Round 1Work into the back bump Sl St w YO in second back bump and next 3 stitches Join to BodySlip stitch twice into the body edge
Round 2Turn and skip joining stitches Sl St w YO in BL Only for 3 stitches Sl St w YO into full stitch head of last stitch
Round 3Chain 1 and turn Sl St w YO in BL Only for all 4 stitches Slip stitch twice into next body edge stitchRepeat Repeat Rows 2 and 3 along the front edge, around the back neck, and down the opposite side At V-neck corners work two slip stitches together to reduce bulkFinish Fasten off and weave in all ends
From the collection
Finishing
- Weave in every tail from the body panel, both sleeves, and the edging strip before blocking.
- Pin the piece to its finished width and steam lightly to relax the slub yarn and settle the row ridges.
- Set the sleeves into the body's armhole edges and seam, then tack the edging flat at the V-neck corners.
Why it works
The body panel is worked entirely flat as one piece, with no seam running down the center back.
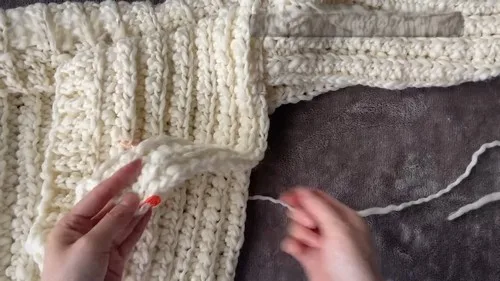
The edging strip is joined into the body's edge with slip stitches as each row is worked, rather than being sewn on after the fact.
What it becomes
- A cardigan for layering over a plain tee or tank on a cool afternoon.
- An oversized topper for errands or a studio day, worn open rather than closed.
- A slouchy piece to throw over a dress when the evening cools down, paired with simple jewelry.
FAQ
What does 'Sl St w YO' actually mean?
It's a slip stitch worked with a yarn over first, as the pattern notes explicitly. It gives a slightly taller, more textured stitch than a plain slip stitch, and shows up at the edges of nearly every row.
Why does the sleeve pattern call for two hook sizes?
The 7mm hook tightens the cuff stitches while the 10mm hook keeps the rest of the sleeve loose and drapey. It's a gauge trick rather than a stitch-pattern trick.
Can I adjust the length of the body or sleeves?
The source intro notes the foundation chain can be adjusted for desired length, so yes. Just keep working in the established back-loop pattern until you reach the length you want.
Does the edging get crocheted separately and sewn on?
No, Part 3 joins into the body's edge row by row as you work it. That's different from most edgings, which get seamed on after the fact.