
Free Pattern
Step-by-Step
Crochet
AmigurumiA plush bull calf amigurumi in chenille yarn
A stitch-by-stitch look at crocheting a plush bull calf amigurumi in chenille yarn.
- Level
- Intermediate
- Time
- 4-6 hours
- Hook
- 4.0 mm
- Yarn
- Worsted
Pattern highlights
- Start with the head, working single crochet in a spiral until the shape rounds out.
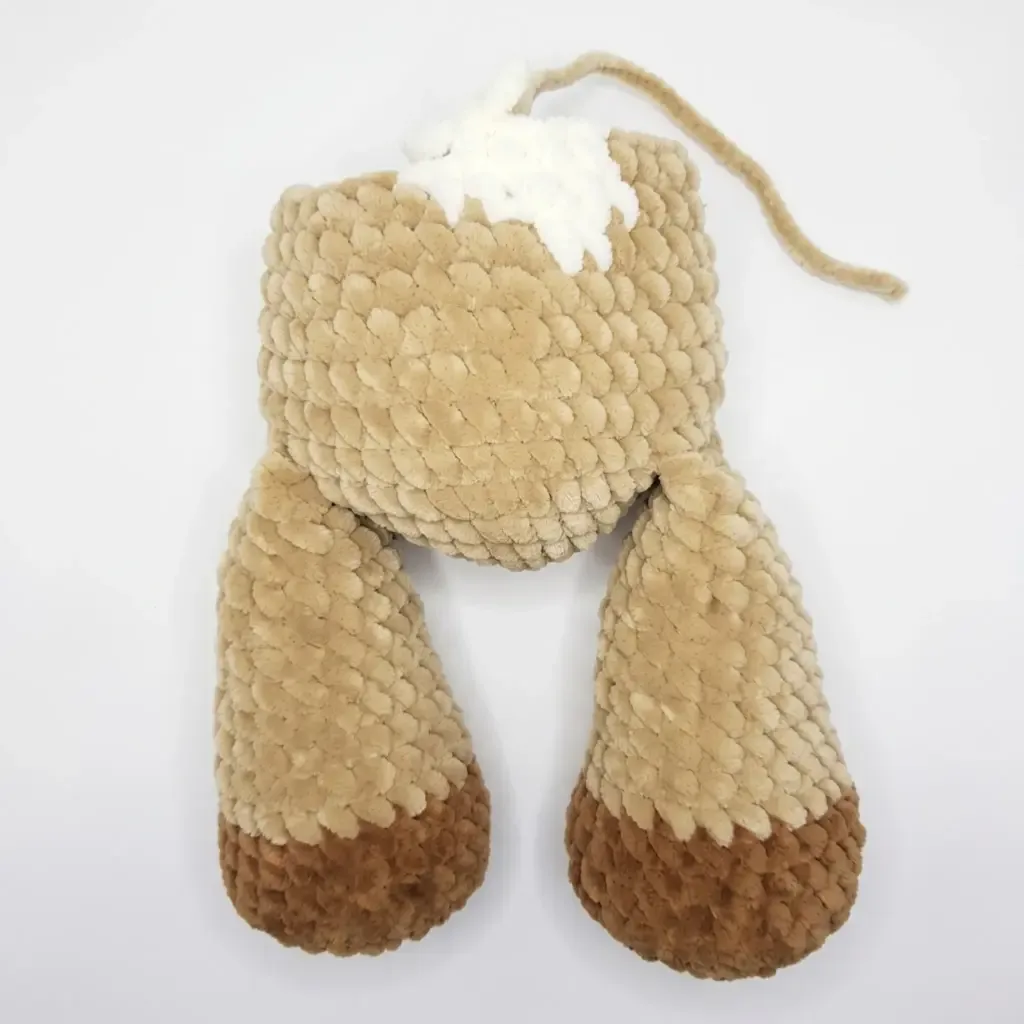
- Crochet the arms and ears separately, keeping them small compared to the head and body.
- Work the tiny muzzle in contrast yarn, then sew it onto the lower half of the head.
- Add safety eyes above the muzzle before closing up the head completely.
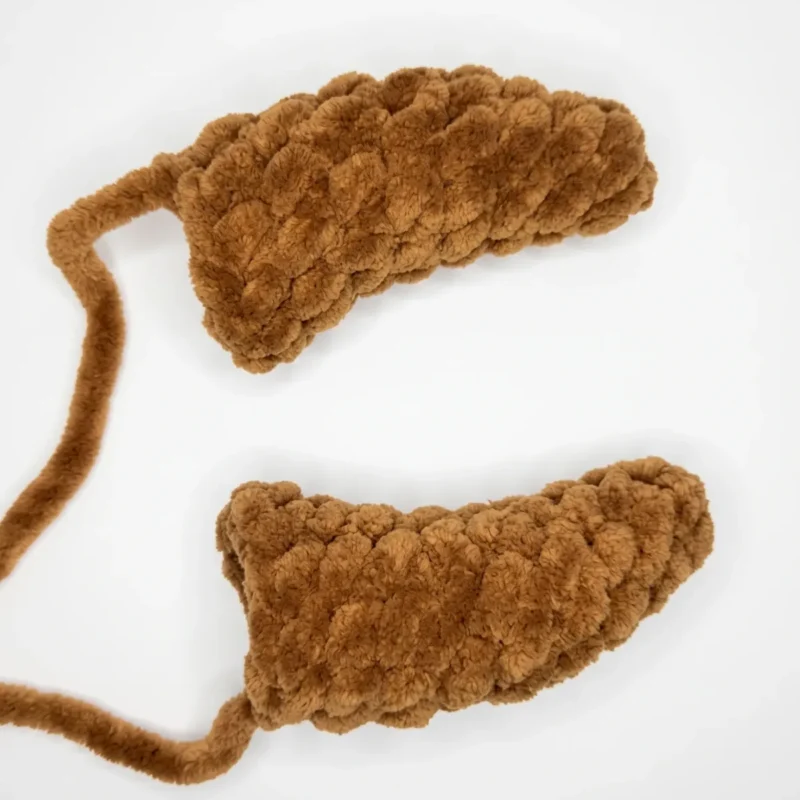
- Shape both horns in contrast color and set them aside for later assembly.
- Sew the head to the body, then attach horns and ears to finish the calf's face.
About This Pattern
A bull calf earns a spot next to the other farm animals in my basket. Amigurumi collections tend to gather chickens, pigs, and sheep before anyone thinks of cattle. This calf fills that gap with a stocky little body, short legs, and a face built for personality. I like a pattern that adds a species I haven't made yet. It keeps the shelf from turning into a flock of identical round heads.
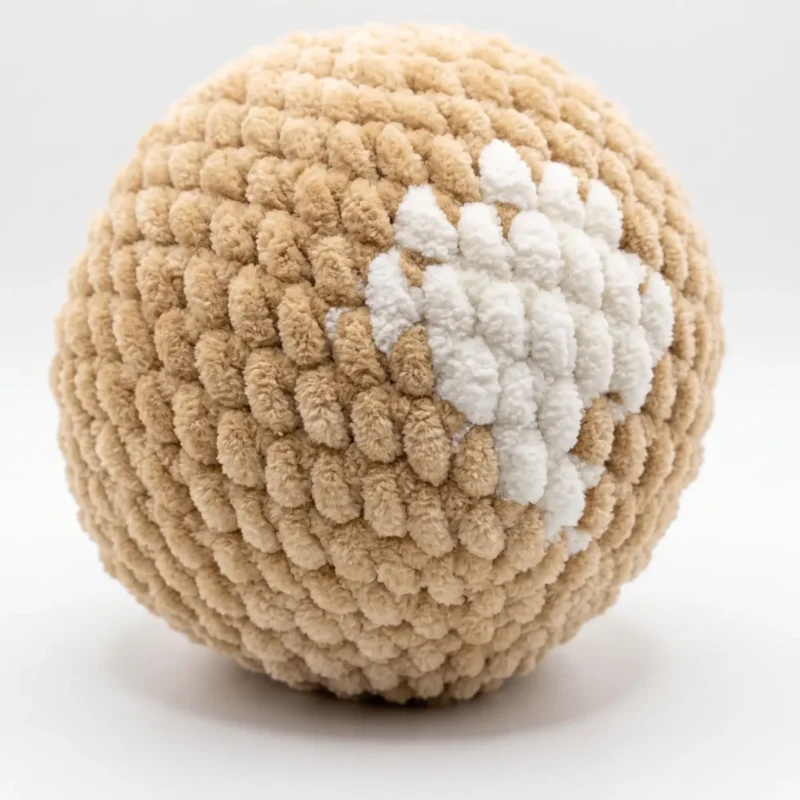
The construction leans on plush or chenille-style yarn, the kind that hides stitch definition on purpose. Contrast color work marks the muzzle, hooves, and horns without any color-change counting mid-round. The legs use back loop only single crochet for a few rounds. That flattens the sole so the calf can stand. Safety eyes go in above the muzzle, and a small scrap of white yarn forms the forehead blaze. Every part is worked in continuous spiral rounds, no joins, no chaining up.
Finished, this is a stubby-legged calf with a big head, small ears, and two short horns. The chenille yarn gives it a soft, velvet finish that reads as fur. There's no actual fur stitching involved. It stands on its flattened feet rather than tipping over, which matters more than it sounds. Sitting on a shelf or a kid's dresser, it holds its own. It fits right in with the rest of the herd I haven't finished yet.
Common mistakes
- Splitting the plush yarn plies Chenille yarn frays if you hook through a single ply. Insert your hook fully under both loops to keep the fuzzy texture intact.
- Inserting safety eyes too early Placing eyes before checking spacing above the muzzle leaves an odd, off-center face. Pin them first, then step back and check placement before pushing the washers on.
- Overstuffing the tiny muzzle The muzzle is only three rounds, and it distorts fast under heavy stuffing. Use just enough fiberfill to round it out, then sew it flat against the head.


Intermediate
Progress Tracker
0 of 0 rounds
Tap a round to tick it off — your place is saved on this device.
The kit
- Worsted weight (CYCA #4) plush/chenille-style yarn (such as a velvet or “dolce” style yarn), approximately 1.5 skeins (100g/120m each) in a main tan/beige color
- Same yarn, approximately 0.5 skein in a contrast brown color for the muzzle, hooves, and horns
- Small scrap of white or cream yarn for the forehead blaze
- Hook size G-6 (4.0 mm)
- Safety eyes, 20mm, 1 pair
- Eyelash appliqués (optional, for eye detailing)
- Polyester fiberfill stuffing
- Yarn/tapestry needle with a large eye
- Sewing needle and matching thread
- Stitch marker
- Scissors
Head
this …
Step by step: 6 sc in MR, using main color. (6).
Round 16 sc in MR. (6)
Round 2inc around. (12)
Round 31 sc, inc repeat around. (18)
Round 42 sc, inc repeat around. (24)sc around, working in BLO — or insert your hook into each stitch from the back side for the same effect. (24)
Round 53 sc, inc repeat around. (30)
Round 64 sc, inc repeat around. (36)4 sc, then sc the next 6 sts together with the 6 open sts of Arm 1, 8 sc, then sc the next 6 sts together with the 6 open sts of Arm 2. (24)Step by step: Change to main color here.
Round 75 sc, inc repeat around. (42)8 sc, then sc the next 7 sts together with the 7 open sts of Leg 1 (working through both layers to join), 12 sc, then sc the next 7 sts together with the 7 open sts of Leg 2, 8 sc. (42)Step by step: sc in each st around. (42).
Round 86 sc, inc repeat around. (48)
Rounds 9–16sc in each st around. (48)Fasten off, leaving a tail for closing. Stuff the body moderately firmly before closing the opening completely.
Round 176 sc, dec repeat around. (42)
Round 185 sc, dec repeat around. (36)Step by step: sc in each st around. (36).Fold the opening flat and sc through both layers to close: 6 sc. Fasten off, leaving a tail for attaching to the body.
Round 194 sc, dec repeat around. (30)Step by step: sc in each st around. (30).
Round 203 sc, dec repeat around. (24)
Round 212 sc, dec repeat around. (18)Fasten off, leaving a long tail for sewing. Weave in any loose ends. Set the head aside — you’ll attach the safety eyes after sewing on the muzzle.
Leg (make 2
Round 16 sc in MR, using contrast color. (6)
Round 2inc around. (12)
Round 31 sc, inc repeat around. (18)
Round 42 sc, inc repeat around. (24)
Round 5sc around, working in BLO — alternatively, insert your hook into each stitch from the back side for the same effect. This keeps the legs sturdy and gives them a flat sole to stand on. (24)
Rounds 6–8sc in each st around. (24)Change to main color here.
Round 910 sc, dec, 10 sc, dec. (22)
Round 10sc in each st around. (22)
Round 119 sc, dec, 9 sc, dec. (20)
Round 12sc in each st around. (20)
Round 138 sc, dec, 8 sc, dec. (18)
Round 14sc in each st around. (18)
Round 157 sc, dec, 7 sc, dec. (16)
Round 16sc in each st around. (16)
Round 176 sc, dec, 6 sc, dec. (14)
Rounds 18–19sc in each st around. (14)
Round 20Fold the opening flat and sc through both layers to close: 7 sc. Fasten off, leaving a tail for attaching to the body.
Ear (make 2)
Round 16 sc in MR. (6)
Round 21 sc, inc repeat around. (9)
Round 3sc in each st around. (9)
Round 42 sc, inc repeat around. (12)
Round 5sc in each st around. (12)
Round 63 sc, inc repeat around. (15)
Round 7sc in each st around. (15)
Round 83 sc, dec repeat around. (12)
Round 92 sc, dec repeat around. (9)
Round 101 sc, dec repeat around. (6)
Round 11Fold the piece flat and sc through both layers to close. Fasten off, leaving a tail for sewing.
Muzzle
Round 1Using contrast color, ch 6 plus 1 turning ch. Starting in the 2nd ch from hook, work 5 sc, then 3 sc into the last ch. Turn and work down the opposite side of the foundation chain with 4 sc, then inc. (14)
Round 22 inc, 4 sc, 3 inc, 4 sc, 3 inc. (22)
Rounds 3–5sc in each st around. (22)Fasten off, leaving a long tail for sewing.
Horn (make 2)
Round 16 sc in MR, using contrast color. (6)
Round 2sc in each st around. (6)
Round 31 sc, inc repeat around. (9)
Round 4sc in each st around. (9)
Round 5inc, 3 sc, dec, 3 sc. (9)
Round 61 sc, inc, 3 sc, dec, 2 sc. (9)
Round 72 sc, inc, 6 sc. (10)
Round 83 sc, inc, 4 sc, dec. (9)
Round 94 sc, inc, 3 sc, dec. (9)Fasten off, leaving a tail for sewing. Weave in any loose ends.
Assembly
Step 1Sew the Muzzle onto the front of the Head, positioning it in the lower-center area.
Step 2Measure and mark where the safety eyes should sit above the muzzle, then insert and secure the safety eyes at those points.
Step 3Using the yarn tail, sew the Head onto the top of the Body with a whipstitch, keeping the muzzle facing forward.
Step 4Sew the two Horns to the Head at the level of Round 4, spacing them evenly on either side of the crown.
Step 5One round below the base of each horn, sew the Ears in place, angling them slightly outward.
Step 6Embroider facial details as desired — nostrils on the muzzle, eyelashes above the eyes, and small eyebrows for extra personality.
Step 7At the back of the body, in your chosen tail position, attach a length of yarn and chain 8 stitches, then finish the end with a small yarn tassel.
Step 8Weave in all remaining yarn ends and trim neatly.
From the collection
Finishing
- Weave in ends on the small pieces first — muzzle, horns, and ears — before starting assembly.
- Stuff the head and body firmly, since chenille yarn hides gaps but not empty spots.
- Whipstitch the head onto the body last, keeping the muzzle centered and facing forward.
Why it works
The ear alternates one increase round with one plain round, from round 2 through round 5. That rhythm gives the ear a gentle curve instead of a flat cone.
The horn is worked over nine rounds, three times longer than the three-round muzzle. That extra length lets the horn taper to a point instead of staying stubby.
What it becomes
- A shelf piece for a nursery or playroom, especially alongside other farm-themed toys.
- A handmade gift for a kid who loves farm animals, no batteries required.
- A photo prop for craft fair displays, paired with other amigurumi livestock like sheep or pigs.
Original pattern: https://amigurumicorner.com/colbie-the-cow-complete-velvet-yarn-amigurumi-crochet-pattern/
FAQ
Can I use regular worsted yarn instead of chenille?
Yes, the pattern will still work with standard worsted weight yarn. You'll lose the plush, velvety texture, but the stitch counts and shaping stay the same.
Why does the pattern use back loop only on the legs?
Working in back loop only for those rounds flattens the front of the stitch, creating a distinct sole. It's a shortcut to a flat foot without decreasing or adding a separate base piece.
How much contrast yarn do I actually need?
The pattern calls for about half a skein of contrast brown for the muzzle, hooves, and horns. That's a small enough amount that leftover scraps from another project might cover it.
Do I need eyelash appliqués for the eyes?
No, they're listed as optional. Plain 20mm safety eyes look fine on their own. The appliqués just add extra lash detail if you like.