
Free Pattern
Step-by-Step
Crochet
AmigurumiA pocket-size crochet bear keychain pattern
A small amigurumi bear worked in rounds, stuffed, and finished with a keychain ring.
- Level
- Beginner
- Time
- 2-3 hours
- Yarn
- Worsted
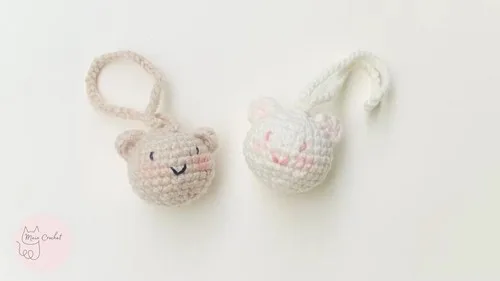
Pattern highlights
- Begin with a magic ring, then work several rounds of single crochet increases to shape a round head.
- Keep increasing every round at first, spacing the increases wider apart as the shape grows.
- Work a few rounds even, without increasing, to build the straight sides before the piece narrows again.
- Add another round of increases later to widen the piece again before closing it.
- Stuff the piece firmly as the last rounds close, filling it evenly with stuffing.
- Weave in the loose ends and attach the keychain ring to finish it.
About This Pattern
This bear keychain sits in the small-scale corner of my amigurumi shelf, the drawer for pieces under two inches that still need a full shaping arc. It starts the same way every round animal does, with a magic ring, then spends its first rounds proving it belongs in that drawer. I keep a few of these on hand for gift tags and bag charms, projects that ask for an evening, not a weekend.
The technique list is short: magic ring, single crochet, and spaced increase rounds that build a rounded body without visible seams. Round 2 doubles every stitch, round 3 doubles every other, so the curve tightens gradually instead of ballooning all at once. Round 8 adds another increase after two flat rounds, the kind of stitch-count math that rewards counting as you go, not after.
Finished, it is a dome-bodied bear small enough to clip to a keyring without weighing down a pocket. The shape comes entirely from increases and plain rounds, no separate pieces to sew on later. Stuff it firmly, close the last round, loop on the keychain ring, and it is done — portable, sturdy, and built to survive being bounced around in a bag.
Worth knowing
What I like here is how much shape comes from so few techniques. Magic ring, single crochet, and increase rounds are the entire vocabulary, yet the bear reads as round and finished by round eight. Round 2 doubles every stitch, round 3 doubles every other, and round 8 increases again, so the curve builds in stages instead of all at once. There is no seaming, no pieced limbs, just one continuous spiral from magic ring to closed top. For a keychain, that matters — fewer joins means fewer weak points to snap loose on a keyring. It is a quick, satisfying proof that increases alone can build a convincing little head.
Common mistakes
- Loose magic ring Pull the tail tight before starting round 2, or the center will show a gap once stuffed.
- Increases landing unevenly Use a stitch marker at the start of each round so round 2 and round 3 increases stay evenly spaced.
- Treating rounds like turned rows The whole piece works in a continuous spiral, not back-and-forth rows, even where the pattern text says 'row'.
- Understuffing the head Add stuffing in small amounts as you close the last rounds, not all at once at the end.
- Lumpy or visible closure Weave the tail through the front loops of the last round before pulling tight, so the seam sits flat.


Beginner
Progress Tracker
0 of 0 rounds
Tap a round to tick it off — your place is saved on this device.
The kit
- Yarn
- Crochet hook
- Stuffing material
- Yarn needle
- Keychain ring
Main Pattern
Round 1Start with a magic ring. Crochet 6 single crochet stitches into the ring. (6 stitches)(6)
Round 2Crochet 2 single crochet stitches into each stitch around. (12 stitches) For Row 3: Crochet 1 single crochet into the first stitch, then 2 single crochet stitches into the next stitch; repeat from * to * around. (18 stitches)(18)
Round 4Single crochet in the first stitch, single crochet in the second stitch, single crochet in the third stitch; repeat from * to * around. (You will have 24 stitches but the video text does not align this number. Please adjust accordingly. )
Round 5Single crochet in each stitch around. (24 stitches) For Rows 6-7: Single crochet in each stitch around, maintaining 30 stitches.
Round 8Single crochet in the first four stitches, then do two single crochet in the fifth stitch; repeat from * to * around until you have 30 stitches.
Round 9Single crochet in the first three stitches, then decrease by crocheting the next two stitches together; repeat from * to * around. (24 stitches)In Row 10: Single crochet in each stitch around. (24 stitches)(24)
Round 11Single crochet in the first stitch, then decrease by crocheting the next two stitches together, single crochet in the fourth stitch; repeat from * to * around to reduce to 18 stitches.
Round 12Single crochet in the first stitch, then 1 single crochet in each of the next two stitches; repeat around. (12 stitches)For Row 13: Decrease by crocheting two stitches together across the entire round. (6 stitches)(12)
Assembly
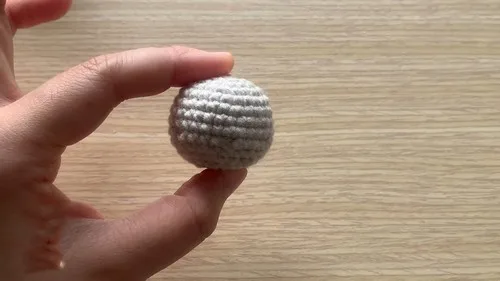
Step 1Close off the body, stuff it with the stuffing material, and then weave in the ends securely.
From the collection
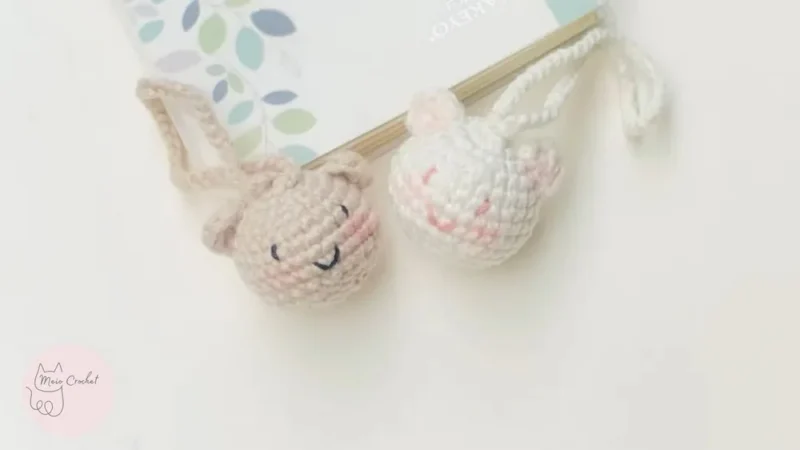
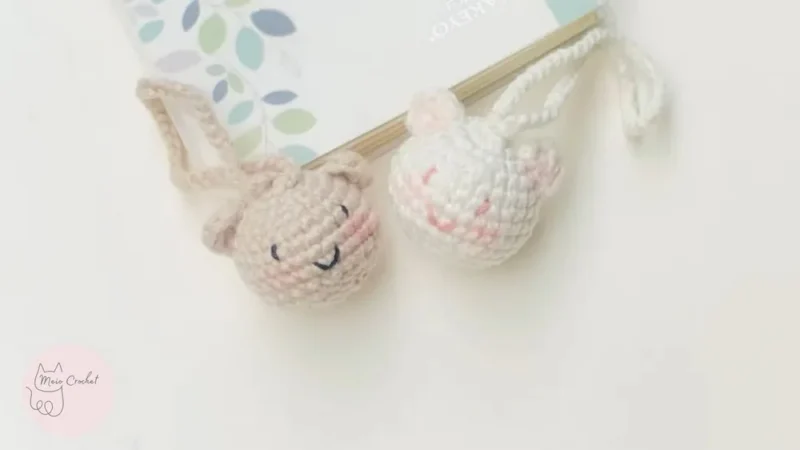
Finishing
- Stuff the body firmly as the last rounds close, pushing filling evenly into the rounded shape.
- Cinch the final round shut and pull the yarn tail through to secure it.
- Weave in every loose end, then loop the keychain ring through the top before setting it down.
Why it works
Round 1 begins with a magic ring and six stitches, keeping the center tight and knot-free.
Round 2 doubles that to twelve stitches, and round 3 adds half again to reach eighteen, the standard amigurumi increase taper.
Round 8 increases again, after rounds of working even, bringing the count up to thirty stitches before the piece moves toward closing.
What it becomes
- Clip it to a keyring to make keys easier to find in a bag.
- Hang it from a backpack zipper as a small, sturdy bag charm.
- Give it as a quick handmade add-on alongside a larger finished amigurumi.
FAQ
Can I use a different yarn weight?
Yes, but the finished bear will change size. The pattern is written for worsted weight, so thinner yarn gives a smaller, tighter keychain.
Why does the pattern mix up 'round' and 'row'?
The whole piece is worked in continuous rounds, not flat rows. Read 'row' as 'round' wherever it appears in the instructions.
How much stuffing does it need?
Enough to feel firm but not stretched, since a loose keychain will go floppy fast. Add it gradually as the last rounds close, not after.
Do I need a keychain ring before I start?
No, you attach it at the very end. Have it ready so the piece doesn't sit unfinished while you search for one.