Free Pattern
Step-by-Step
Crochet
Bags & TotesRectangular Base Crochet Tote Bag With Button Closure
A flat-bottomed crochet tote worked in rounds, finished with handles and a button closure.
- Level
- Intermediate
- Time
- 4-6 hours
- Yarn
- Worsted
Pattern highlights
- Chain a foundation and work single crochet around both sides to form an oval base with marked corners.
- Build up the base through several rounds, increasing at each corner while keeping the sides even.
- Watch the base grow into its finished rectangular shape as the corner increases taper off.
- Mark symmetrical points on the bag body where the two handles will attach.
- Chain and single crochet each handle separately, using a smaller hook for tighter stitches if needed.
- Attach both handles to the opposite sides of the bag opening.
- Finish with a button closure, and add a keychain if you'd like a matching accessory.
About This Pattern
I keep a folder of bag patterns separate from my toys and amigurumi, and this tote lives there. It's a straightforward rectangular-based build, the kind I reach for when I want something useful rather than decorative. A tote earns its keep by being carried, not admired on a shelf. This one starts life as a simple chain, which always feels like a small dare before the shaping begins.
The technique worth noting here is the corner increase progression. Row one turns a plain chain into a shape with three loops marked at each corner. From there, each round adds a staggered increase -- 2-1, then 2-1-1, then 2-1-1-1 -- so the corners grow without turning into points. It's a tidy bit of logic once you see the pattern, and it keeps the stitches along each long side honest.
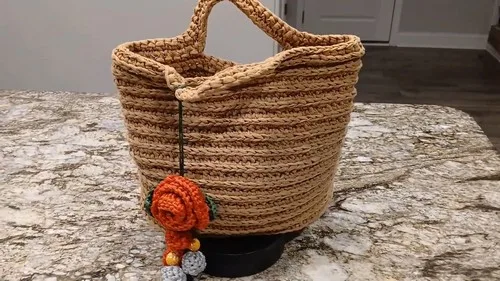
What comes off the hook is a rectangular-based tote with a real footprint, plus two handles chained separately and single crocheted for structure. A button closes the top, and there's room to add a matching keychain if you want the set. It's the kind of bag that goes to the market or sits by the door, unbothered by what it's asked to carry.
Customize it with your favorite yarn colors, or add embellishments to make it uniquely yours.
Worth knowing
There's something satisfying about watching a chain become a shape you can actually use. The corner math here -- three loops marked, then increased in a shifting 2-1 count each round -- is the kind of detail I like tracking as I go. You're not just repeating a round; you're watching a pattern evolve stitch by stitch. Working the base flat first, then closing it into rounds, gives the bag a sturdy, squared-off bottom instead of a soft curve. The handles are their own small project, chained and single crocheted separately before they're attached. By the time the button goes on, you've used chaining, single crochet, slip stitching and a bit of counting discipline. It's a compact lesson in shaping, dressed up as a shopping bag.
Common mistakes
- Losing track of corner stitches It's easy to miscount the three marked loops at each corner. Check your stitch markers before starting a new round so the increases land in the right spot.
- Forgetting the two-meter tail Cutting the starting yarn too short leaves nothing for seaming later. Leave the full length before chaining, as noted, so you have enough to close the round.
- Increase pattern drifting off-count The 2-1, 2-1-1, 2-1-1-1 progression is easy to blur between rounds. Mark the start of each round so you always know which increase you're on.
- Skipping the symmetrical handle markers Placing handles by eye instead of marking points first leads to a lopsided carry. Mark both sides before chaining the handles so they land evenly.
Intermediate
Progress Tracker
0 of 0 rounds
Tap a round to tick it off — your place is saved on this device.
The kit
- Yarn of your choice
- Crochet hook (a smaller hook for tighter handle stitches, if needed)
- Leave a 2-meter tail before chaining
- Chain 15 stitches
- Stitch markers (to mark the first chain, corners, and handle points)
- Button for closure
Main Pattern
Your base should now measure approx. 27.5 cm (10.5 inches) by 14 cm (5.5 inches) after Row 7.
Final bag height: approx. 21 cm; Circumference: approx. 30 cm.
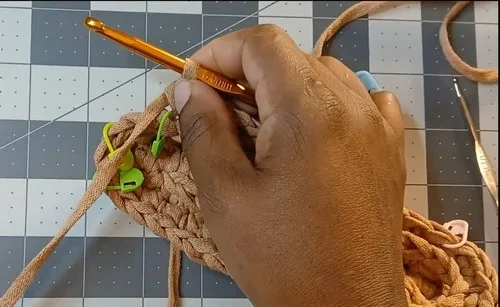
Round 1Chain 15 stitches; mark the first chain; skip the first chain; single crochet into the next 13 chains; in the last chain work 3 single crochets (mark the first and last of the three); turn and single crochet down the other side of the chain until stitch 12; use the leftover yarn to slip stitch 11 times in the middle (skip the first one); ensure 3 loops are at each corner; each long side should have 12 single crochets between corners.
Round 2In each corner, 2 single crochets (increase); work 12 single crochets on each side; close the round with the back yarn.
Round 3Follow a 2-1 pattern at the corners (two single crochets in one stitch, then one in the next); 12 single crochets on each side.
Round 4Use a 2-1-1 pattern at the corners; maintain 12 single crochets per side.
Round 5Use a 2-1-1-1 pattern at the corners; continue with 12 single crochets per side.
Round 6Use a 2-1-1-1-1 pattern at the corners; continue with 12 single crochets per side.
Round 7Use a 2-1-1-1-1-1 pattern at the corners; continue with 12 single crochets per side.
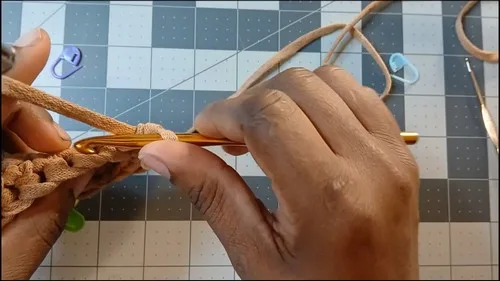
Rounds 8–28Work 66 single crochets in each row to build the height.
Assembly
Step 1Mark symmetrical points for the handles.
Step 2Chain 18 for each handle (16–17 cm long).
Step 3Attach to the opposite side, skipping stitches accordingly.
Step 4Single crochet around each handle; use a smaller hook if needed for tighter stitches.
Step 5Repeat for the second handle.
Step 6Add a button for closure.
Step 7Optional: Create a matching keychain to clip onto the bag.
From the collection
Finishing
- Weave in the two-meter tail left from the foundation chain once the base rounds are complete.
- Attach both handles at the marked symmetrical points, working single crochet around each for a firmer grip.
- Sew on the button, then weave in any remaining ends before the bag is ready to carry.
Why it works
Row 1 is worked flat, back and forth along the chain, before the round closes with slip stitches -- that's what gives the base its straight sides instead of a circle.
The corner increases shift pattern each round -- 2-1, then 2-1-1, then 2-1-1-1 -- so each corner widens gradually instead of jumping in width all at once.
Every long side holds a steady count of single crochets between corners, so all the shaping happens at the four corner points, not along the sides.
What it becomes
- A market or grocery run, where the flat rectangular base holds its shape against cans and produce.
- An everyday carryall for a book and a water bottle, paired with the optional matching keychain clipped to a zipper pull.
- A simple project bag for another crochet project in progress, since the button closure keeps the top secure.
FAQ
Why does the base start as a flat oval instead of a circle?
Row one is worked back and forth along a chain, single crocheting down both sides before joining into a round. That flat start with three marked corner loops is what gives the base its straight sides.
Do the corner increases ever stop?
The corner pattern grows from 2-1 up through 2-1-1-1 as rounds progress, and the base reaches its finished measurement after row seven. After that the shaping is done and you're working straight rounds.
Can I use any yarn for this tote?
The pattern leaves yarn choice open, so this works with whatever fiber and weight you have on hand. Just keep an eye on your gauge since it will affect the final bag size.
What if I only want one handle length?
Both handles are chained to the same length and attached at symmetrical points for balance. If you shorten one, shorten the other to match so the bag hangs evenly.