Free Pattern
Step-by-Step
Crochet
Home DecorSheep coaster placemat crochet pattern with chain-loop fleece
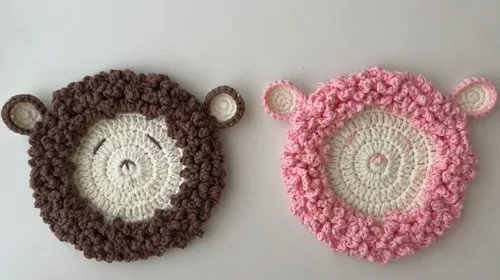
A small sheep coaster placemat worked in double-strand yarn with a chain-loop fleece and color-block ears.
- Level
- Easy
- Time
- 1-2 hours
- Hook
- 1.5 mm
- Yarn
- Lace (held double)
Pattern highlights
- Start the face with a magic ring and work increase rounds in single and double crochet until it's full.
- Repeat the chain-4 loop pattern for each hair round, then cut the yarn when the fringe is finished.
- Embroider the facial features onto the finished face before placing the ears.
- Sew the ears into position once the face markings guide their placement.
About This Pattern
A sheep coaster placemat sits in that corner of my collection reserved for small novelty makes. It's not a sweater, not a blanket — just a tidy, round project with personality. I like keeping these on hand for gift baskets or quick weekend makes. The double-strand yarn and tiny 3.5mm hook keep the whole piece dense and coaster-worthy, not floppy. It's the kind of pattern that teaches a technique in miniature before you'd try it on something bigger.
What comes out the other end is a small, flat sheep face. It's ringed with a woolly fringe of chain loops and finished with two neat ears. Flat enough to use as a coaster, sturdy enough to double as a tiny placemat. The double strand of yarn keeps the fabric firm, so it holds its shape under a mug. It's a quick, charming object — more character than most coasters manage.
Common mistakes
- Losing the front loop for hair Pick up only the front loop of round six when joining for hair, not both loops, or the back-loop ridge disappears.
- Magic ring pulled too loose Cinch the magic ring tight on the face and both ears before counting stitches, or a hole shows at the center.
- Skipping the stitch marker Mark the first stitch of every round as instructed, since the increase pattern depends on knowing where each round starts.
- Chain-4 loops worked unevenly Keep the chain-4 loops in the hair rounds consistent in length, or the fleece looks lopsided once finished.

Easy
Progress Tracker
0 of 0 rounds
Tap a round to tick it off — your place is saved on this device.
The kit
- 1.5mm/double strand yarn
- 3.5mm hook
Face (8 Rounds)
Make a magic ring
Round 112 single crochets (sc) into the ring, mark first stitch, join with slip stitch (sl st)
Round 2Chain 2 (ch 2), 2 double crochets (dc) in each stitch around, join with sl st
Round 3Ch 2, repeat (1 dc, 2 dc) around, join with sl st
Round 4Ch 2, repeat (2 dc, 1 dc, 1 dc) around, join with sl st
Round 5Ch 2, repeat (1 dc, 1 dc, 1 dc, 2 dc) around, join with sl st
Round 6Ch 1, working in back loop only, repeat (2 sc, 1 sc, 1 sc, 1 sc, 1 sc) around, join with sl st
Round 7Ch 1, working in back loop only, repeat (1 sc, 1 sc, 1 sc, 1 sc, 1 sc, 2 sc) around, join with sl st
Round 8Ch 1, working in back loop only, repeat (2 sc, 1 sc, 1 sc, 1 sc, 1 sc, 1 sc) around, join with sl st, ch 1, cut yarn
Hair (3 Rounds)
Using a different color, join yarn to a front loop from Face Round 6 and ch 1
Round 1Repeat (1 sc in each stitch, ch 4) around, join with 1 sc in the first stitch
Round 2Ch 4, repeat (1 sc in each stitch, ch 4) around, join with 1 sc in the first stitch
Round 3Ch 4, repeat (1 sc in each stitch, ch 4) around, join with 1 sc in the first stitch, ch 1, cut yarn
Ears (Make 2)
Start with a magic ring
Round 16 sc in ring, mark first stitch, join with sl st, ch 1
Round 22 sc in each stitch around, join with sl st, ch 1
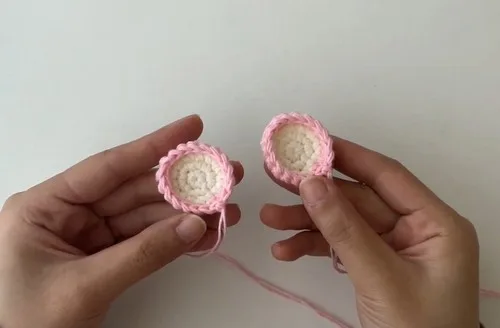
Round 3Repeat (1 sc, 2 sc) around, switch yarn color on last stitch, join with sl st, ch 1
Round 41 sc in each stitch around, join with sl st, ch 1, cut yarn
Assembly
Step 1Embroider facial features onto the face to guide ear placement
Step 2Sew the ears onto the face in the correct positions
From the collection
Finishing
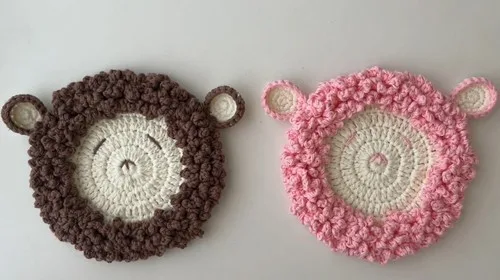
- Weave in any loose ends left from the magic rings and color changes.
- Embroider the facial features onto the face first, using them to map out ear placement.
- Sew both ears into place once the markings show where they belong.
Why it works
The face grows through paired increases each round — doubling, then spacing increases further apart — which is how a flat circle stays flat.
Hair is joined to the front loop only of round six, not the whole stitch, leaving the back loop as a visible ridge the fleece sits on.
What it becomes
- A coaster under a mug of tea on a side table, paired with a plain linen runner.
- A small placemat for a child's bowl, set next to simpler woven cotton mats.
- A shelf piece in a basket of handmade coasters, mixed with other novelty shapes.
Original pattern: https://crocheteverything.com/adorable-sheep-coaster-placemat-crochet-pattern-with-spring-vibes/
FAQ
Why does the pattern use a double strand of yarn?
Working with two strands held together makes the fabric denser, which suits a coaster meant to sit under a warm mug. It also fills in the small 3.5mm hook nicely.
Why join the hair into just the front loop of round six?
It leaves the back loop exposed as a clean ridge, which gives the fleece something to sit on top of. It's a small construction choice, not just a style one.
Where do I add the facial features?
Embroider them onto the face before attaching the ears, since the pattern uses the features to guide ear placement. That order keeps the face symmetrical.