
Free Pattern
Step-by-Step
Crochet
AmigurumiSmall crochet chicken amigurumi pattern
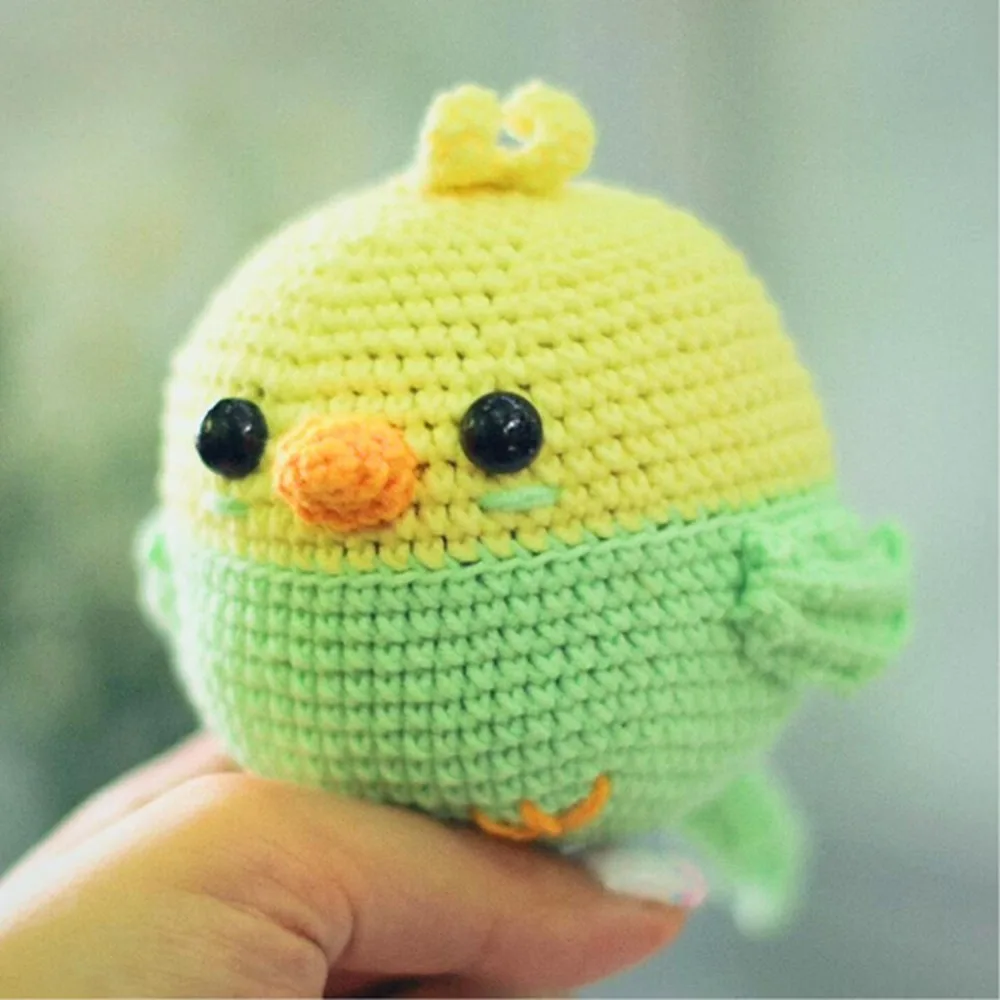
A small crochet chicken amigurumi with wings, tail, crest and beak, built round by round.
- Level
- Intermediate
- Time
- 4-6 hours
- Hook
- 2.00 mm
- Yarn
- Worsted
Pattern highlights
- Start the body in green yarn and work it in continuous rounds from a magic ring.
- Chain and work the wings flat, turning at the end of every row.
- Chain and work the tail flat the same way, a little longer than the wings.
- Crochet the small beak and crest separately in their own short rounds.
- Stuff the body before closing it, then sew wings, tail, beak and crest into place.
- Add safety eyes and embroider cheeks and feet to finish the face and stance.
About This Pattern
Farm animals turn up often in my notebook, and a chicken always earns its spot. This one is small, which makes it a good bridge project between a simple sphere amigurumi and something with more parts hanging off it. Five separate pieces join to one body, so it teaches assembly as much as stitching.
Finished, it stands on two color changes: green for the body, yellow accents for the crest and feet embroidery. Safety eyes and a light yellow belly patch give it a face and a front. It reads as a toy first, a shelf figure second.
Worth knowing
I like a pattern that hides its structure until you build it. The body alone is nine plain rounds of single crochet increases, easy enough to do while half-watching something else. Then the wings and tail turn a corner: back-and-forth rows, back loops only, with slip stitches mixed into the single crochet to shape the curve of a feather. That texture change is the whole appeal. You get one calm round piece and two fussier flat ones, and sewing them together is where the chicken actually appears. The crest and beak are quick enough to feel like a reward for finishing the fiddlier parts first.
Common mistakes
- Losing track of back loop only rows Check the front loop is left unworked on every row of the wings and tail, not just the first one.
- Under-stuffing before closing the body Add stuffing gradually as you approach the final rounds, since the opening gets too small to fit much in after.
- Turning chains counted as stitches Treat the chain-1 or chain-3 at the end of each wing and tail row as a turning chain only, not a stitch to work into.
- Placing the beak off-center Sew the beak between where the safety eyes will sit before fixing the eyes permanently.


Intermediate
Progress Tracker
0 of 0 rounds
Tap a round to tick it off — your place is saved on this device.
The kit
- Yarn (Cotton+acrylic): Green, Light Yellow, Yellow
- Hook 2.00 Mm
- Stuffing
- Safety Eyes
- Needle
Body
Green Yarn
Round 18 Sc In Mr
Round 2*1 Sc, 3 Sc In 1 Stitch* Repeat 4 Times (16)
Round 31 Sc, 3 Sc In 1 Stitch, *3 Sc, 3 Sc In 1 Stitch* Repeat 3 Times, 2 Sc (24)
Round 42 Sc, 3 Sc In 1 Stitch, *5 Sc, 3 Sc In 1 Stitch* Repeat 3 Times, 3 Sc (32)
Round 53 Sc, 3 Sc In 1 Stitch, *7 Sc, 3 Sc In 1 Stitch* Repeat 3 Times, 4 Sc (40)
Round 64 Sc, 3 Sc In 1 Stitch, *9 Sc, 3 Sc In 1 Stitch* Repeat 3 Times, 5 Sc (48)
Round 75 Sc, 3 Sc In 1 Stitch, *11 Sc, 3 Sc In 1 Stitch* Repeat 3 Times, 6 Sc (56)
Round 86 Sc, 3 Sc In 1 Stitch, *13 Sc, 3 Sc In 1 Stitch* Repeat 3 Times, 7 Sc (64)
Rounds 9–16/8 Rounds/64 Sc
Wings
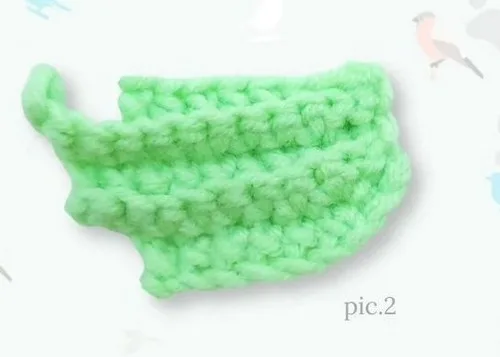
Make Chain Of 9 Chain Stitches, Start Crochet In 2nd Loop From Hook Back-and-forth Rows. All Rows Crochet Back Loops Only
Round 18 Sc, 3 Ch, Turn
Round 2Start In 2nd Loop, 8 Sc, 2 Ss, 1 Ch, Turn
Round 3Start In 2nd Loop, 2 Ss, 8 Sc, 3 Ch, Turn
Round 4Start In 2nd Loop, 10 Sc, 2 Ss, 1 Ch, Turn
Round 5Start In 2nd Loop, 2 Ss, 6 ScCut the yarn and leave a long end for sewing. Crochet the second wing in the same way (Pic.2).
Tail
Make Chain Of 11 Chain Stitches, Start Crochet In 2nd Loop From Hook Back-and-forth Rows. All Rows Crochet Back Loops Only
Round 110 Sc, 1 Ch, Turn
Round 2Start In 2nd Loop, 10 Sc, 3 Ch, Turn
Round 3Start In 2nd Loop, 12 Sc, 1 Ch, Turn
Round 4Start In 2nd Loop, 12 Sc, 5 Ch, Turn
Round 5Start In 2nd Loop, 16 Sc, 1 Ch, Turn
Rounds 6–7Start In 2nd Loop, 12 Sc, 1 Ch
Round 8Start In 2nd Loop, 10 ScStep by step: cut the yarn and leave a long end for sewing (Pic.3); fold the piece in half and sew the first and last rows together (Pic.4); leave the end for sewing (Pic.5).
Beak
Yellow Yarn
Round 16 Sc In Mr
Round 2*1 Sc, 1 Inc* Repeat 3 Times (9)
Round 32 Ss, *1 Inc, 2 Sc* Repeat 2 Times, 1 Inc (12)
Round 43 Ss, 9 Sc (12)Fasten Off In Invisible Way
Crest
Pic.6 Make Chain Of 9 Chain Stitches, Start Crochet In 2nd Loop From Hook Back-and-forth Rows.
Round 18 Sc, 1 Ch, Turn
Round 2Start In 2nd Loop, 7 Sc, 7 Ch, Turn
Round 310 ScCut the yarn and leave an end for sewing (Pic.7).
Body: Color Change
Change Color To Light Yellow
Round 17Blo 64 Sc
Rounds 18–21/4 Rounds/ 64 Sc
Round 22*7 Sc, 1 Dec, 7 Sc* Repeat 4 Times (60)
Round 23*13 Sc, 1 Dec* Repeat 4 Times (56)
Round 24*6 Sc, 1 Dec, 6 Sc* Repeat 4 Times (52)
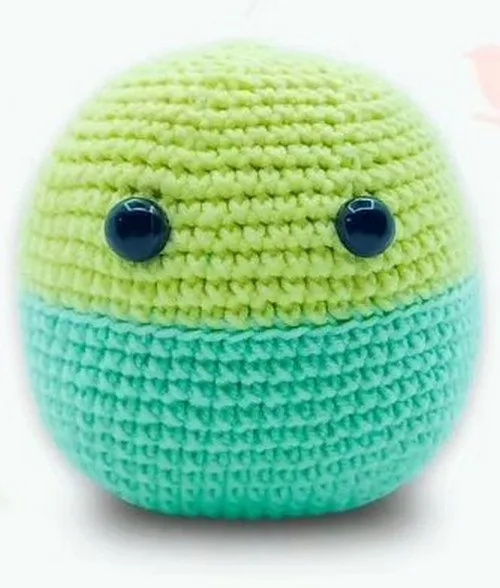
Round 25*11 Sc, 1 Dec* Repeat 4 Times (48)Insert Eyes Between 20th And 21st Rounds.
Distance Between Eyes 9 Stitches
Round 26*6 Sc, 1 Dec* Repeat 6 Times (42)
Round 27*5 Sc, 1 Dec* Repeat 6 Times (36)
Round 28*4 Sc, 1 Dec* Repeat 6 Times (30)
Round 29*3 Sc, 1 Dec* Repeat 6 Times (24)
To Stuff
Round 30*2 Sc, 1 Dec* Repeat 6 Times (18)
Round 31*1 Sc, 1 Dec* Repeat 6 Times (12)
Round 32*6 Dec* Repeat 6 Times (6)Close Off The Hole (Pic.1)
Assembly
Step 11. Sew Wings On The Sides
Step 22. Sew A Tail On The Back
Step 33. Sew A Beak Between The Eyes
Step 44. Sew A Crest On Top
Step 55. Embroider Cheeks With Green Thread
Step 66. Embroider The Feets With Yellow Thread
From the collection
Finishing
- Weave in every yarn end as each piece finishes, since five separate parts means five sets of tails.
- Stuff the body firmly before the final rounds close, packing extra into the base for a stable stand.
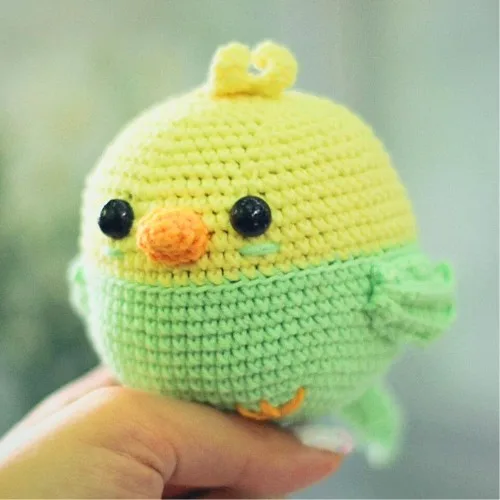
- Sew wings to the sides, tail to the back, and beak and crest to the head, then add safety eyes and embroider cheeks and feet.
Why it works
The body increases every round early on, a standard flat-to-round shaping that widens the base before the sides go straight.
Wings and tail are worked as flat back-and-forth rows because they need a curved, feather-like profile rather than a closed tube.
Back loop only crochet on the wings, tail and part of the body leaves the front loops free, which is what makes that ridged texture visible.
What it becomes
- A shelf toy for a kitchen or farmhouse-themed room, paired with other small amigurumi animals.
- A soft companion for a young child, sized for small hands to hold.
- A gift for someone who collects small crochet figures rather than large stuffed animals.
Original pattern: https://redagapeblog.com/small-crochet-chicken-amigurumi-pattern/
FAQ
Do I need to know back loop only crochet before starting?
Yes, both the wings and tail rely on it throughout. It is a simple technique, just easy to forget mid-row.
Can I use a different yarn weight than what is listed?
The pattern is written for a cotton-acrylic blend with a 2.00 mm hook, so a similar light worsted weight will keep the proportions close. A much thicker yarn will change the finished size.
Why are the wings and tail worked flat instead of in the round?
Flat rows let the piece curve and taper the way a feather shape needs to. Working them in the round would keep them tube-shaped instead.
In what order should I assemble the pieces?
Finish and stuff the body first, then attach wings, tail, beak and crest before the embroidery. That way the face and stance are the last details added.