
Free Pattern
Step-by-Step
Crochet
AmigurumiA soft crochet penguin amigurumi for kids to play
A soft crochet penguin amigurumi, built in single crochet rounds for kids to play with.
- Level
- Beginner
- Time
- 4-6 hours
- Hook
- 2 mm
- Yarn
- Sport/DK
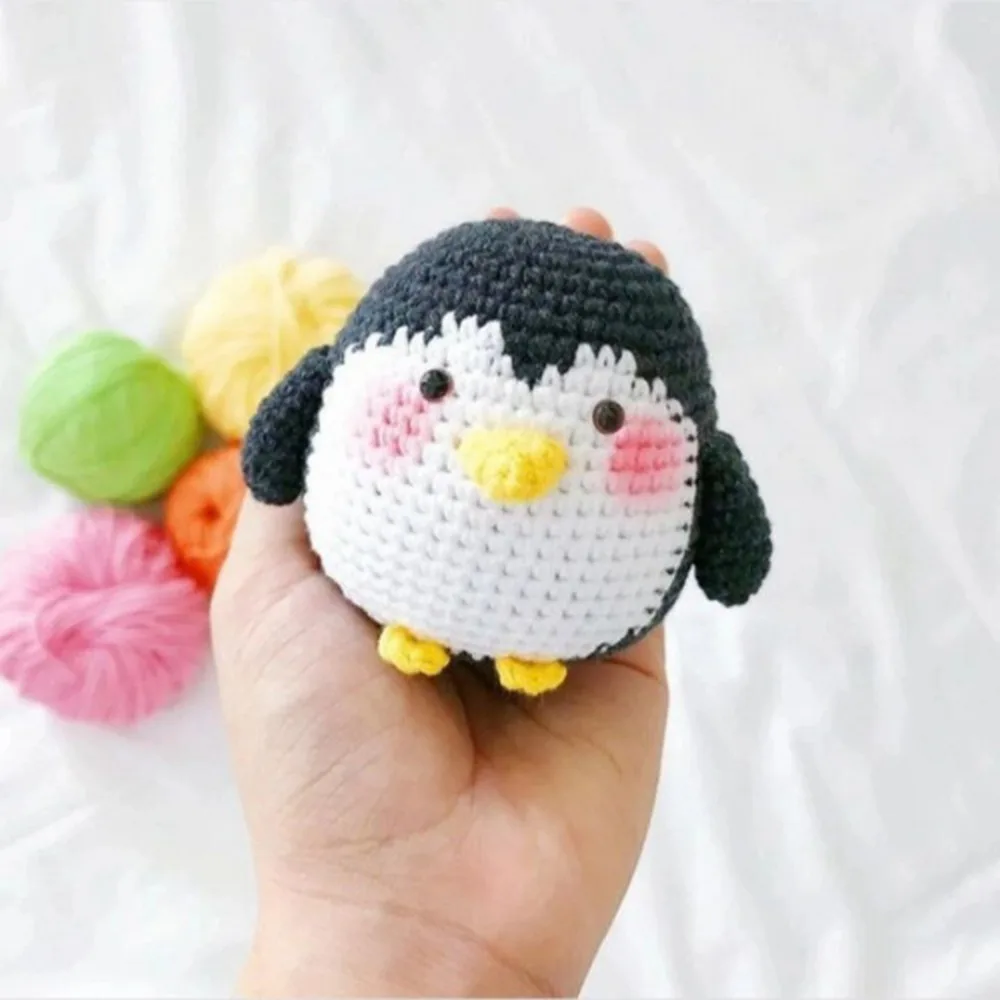
Pattern highlights
- Start the body with a magic ring, then build outward through a run of increase rounds.
- Keep working the body in a continuous spiral until it reaches its full rounded shape.
- Make the beak separately in yellow, shaping it over just a few short rounds.
- Crochet two wings the same way, shaping first, then working several plain rounds after.
- Stuff the body with fiberfill as you close the final rounds at the top.
- Sew the beak, wings, and feet onto the body, then set the safety eyes.
About This Pattern
This penguin lands in my amigurumi drawer, next to the other small animals I keep making. It's a one-color-per-part build — black body, yellow beak. That reads instantly, even at this size. I like patterns like this for a collection — compact, easy to recognize, quick to shelve. A baby penguin fits my running theme too. Small toys made for kids' hands, not shelves out of reach. It earns its spot by being simple without being boring.
The whole piece leans on four techniques: magic ring, single crochet, increase, and back loop only. Nothing exotic — this is the toolkit that builds most amigurumi. The magic ring starts every part tight and gap-free, which matters more on a shape this small. Increases fall in tidy, spaced-out patterns, so the body's curve builds gradually instead of all at once. BLO adds a subtle ridge, the kind of detail only noticed once you know to look for it.
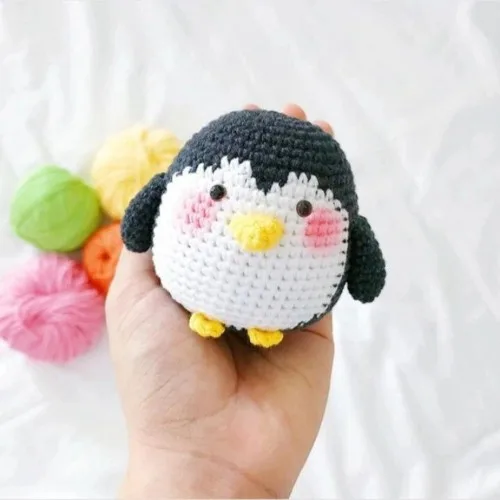
Finished, it's a small round body with two wings, a stubby beak, and feet stitched on below. The proportions stay toy-sized — nothing here needs a mannequin or a shelf. Safety eyes and a bit of black embroidery thread give it a face without much fuss. It's the kind of penguin that ends up in a toy bin, not on a shelf.
Worth knowing
There's something satisfying about a body that grows in order, round by round. Each increase round does exactly one job, from 8sc up to 32. The magic ring closes clean at the top of the body, the beak, and each wing. No gap stares back at you, which matters on something this small. The wings hold steady at 12sc for five plain rounds after the shaping is done. That gives a straight little paddle, easy to sew flat against the body. Every part leans on the same short list of moves: ring, increase, plain rounds, cut, sew. That rhythm makes it a good project for checking that your increases land where they should.
Common mistakes
- Loose magic ring Pull the tail snug before the first round, or the ring gaps at the center.
- Miscounted increase spacing Mark the first stitch of each round, since the gap between increases changes every row.
- Skipping the back loop Check which rounds call for BLO, or the ridge detail disappears into the surface.
- Eyes placed too early Test eye placement on the unstuffed body first, since stuffing shifts the surface.
- Yarn tails cut too short Leave a long tail on the beak and wings, there's sewing left to do.


Beginner
Progress Tracker
0 of 0 rounds
Tap a round to tick it off — your place is saved on this device.
The kit
- Following are the supplies used by the designer for crocheting this penguin amigurumi:
Yarn
- Sport or DK lightweight yarn. (The designer used Yarnart Jeans which is very nice cotton yarn)
Crochet hook
- 2mm-2.5mm
Tools
- Black embroidery thread
- Fiberfill (Polyester)
- Yarn needles
- Safety eyes size 5-6mm
Body
Start with black
Round 18sc in MR (8)
Round 28-inc (16)
Round 3(sc, inc) * 8 (24)
Round 4(2sc, inc) * 8 (32)
Round 5sc, inc, (3sc, inc) * 7 (40)
Rounds 6–740sc (40)
Round 8(4sc, inc) * 8 (48)
Round 9Black 19sc, (white) 3sc, (black) 3sc, (white) 3sc, (black) 20sc (48)
Round 10Black 17sc, (white) 6sc, (black) 1sc, (white) 6sc, (black) 18sc (48)
Round 11Black (5sc, inc) * 2, 4sc, (white) sc, inc, (5sc, inc) * 2, sc, (black) 4sc, inc, (5sc, inc) * 2 (56) insert the safety at rnd 11, 12, 8sc apart.
Rounds 12–14(3 rnds) (black) 17sc, (white) 20sc, (black) 19sc (56)
Rounds 15–20(6 rnds) (black) 18sc, (white) 19sc, (black) 19sc (56)
Round 21Black 19sc, (white) 18sc, (black) 19sc (56)
Round 22Black 20sc, (white) 16sc, (black) 20sc (56)
Round 23Black 21sc, (white) 14sc, (black) 21sc (56)
Round 24Black (5sc, dec) * 3, 2sc, (white) 3sc, dec, 5sc, (black) dec, (5sc, dec) * 3 (48)
Round 2548sc (48) (black to the end)(48)
Round 26(4sc, dec) * 8 (40)
Round 27(3sc, dec) * 8 (32)
Round 28(2sc, dec) * 8 (24)
Round 29BLO (sc, dec) * 8 (16)
Round 308-dec (8) cut the yarn and weave in the end.
Beak
Round 1With yellow yarn 4sc in MR (4)
Round 2(sc, inc) * 2 (6)
Round 3(2sc, inc) * 2 (9), slst cut the yarn, leave long tail for sewing
Wing * 2
Round 14sc in MR (4)
Round 24-inc (8)
Round 3(3sc, inc) * 2 (10)
Round 4(4sc, inc) * 2 (12)
Rounds 5–9(5 rnds) 12sc (12) cut the yarn, leave the long tail for sewing(12)
Feet * 2
Make 2 chains, insert the hook into the first chain, make 3sc, 1 chain, slst. Cut the yarn, leave a long tail, and sew to the body.
Baby penguin is ready.
Designer; Beary_bearnita_ On Instagram
From the collection
Finishing
- Weave in every yarn end before stuffing, especially tails left long for sewing.
- Stuff the body firmly with polyester fiberfill so the rounded shape holds its curve.
- Sew on the beak, both wings, and both feet, then set the safety eyes.
Why it works
The body starts at 8sc in the ring, then adds 8 more stitches each round through round 4.
The beak takes just 3 rounds in yellow, then closes with a slip stitch and a cut.
Each wing shapes over 4 rounds, then holds steady at 12sc for 5 more rounds.
What it becomes
- A soft toy sized for small hands, good for a stroller or a car seat.
- A shelf piece for a nursery or playroom, next to other small amigurumi animals.
- A practice piece for learning magic rings and increases before a bigger amigurumi project.
Original pattern: https://redagapeblog.com/crochet-baby-penguin-pattern/
FAQ
How long does this penguin take to make?
Plan for about four to six hours, spread across the body and three smaller parts. Small amigurumi like this go faster once you're used to the increase pattern.
What yarn weight works best for this pattern?
The designer used a sport or DK weight cotton yarn, which keeps the stitches tight. A lighter yarn like this holds detail well on a small amigurumi.
Can I use a hook size outside the 2mm to 2.5mm range?
Stick close to that range if you want a tight, gap-free fabric for stuffing. Going much larger loosens the stitches and lets the fiberfill peek through.
Does the penguin stand on its own once it's finished?
The feet give it a base, so a well-stuffed body should balance upright. Firm stuffing throughout the body helps it hold that stance.