Free Pattern
Step-by-Step
Crochet
AccessoriesStar stitch ear warmer to crochet for winter
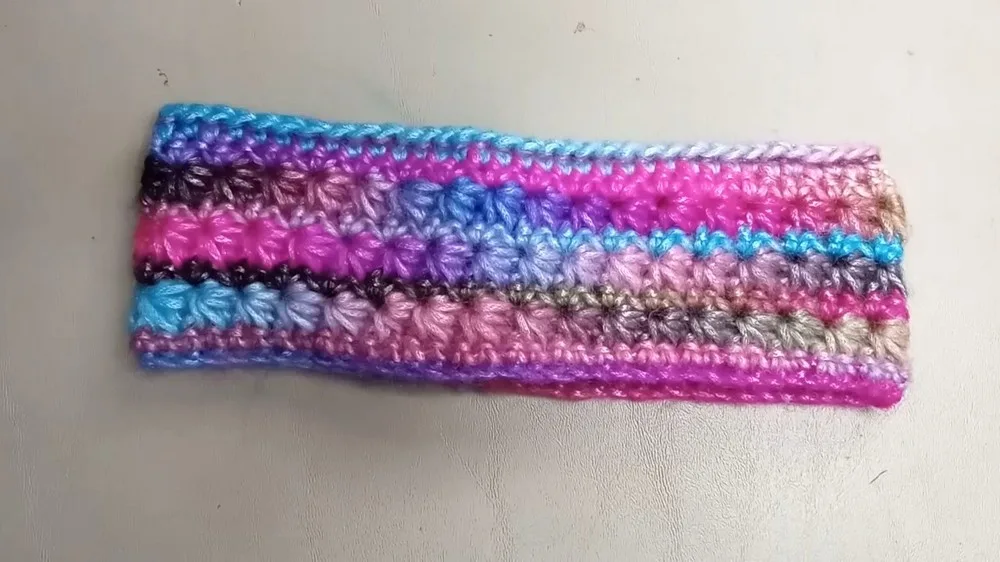
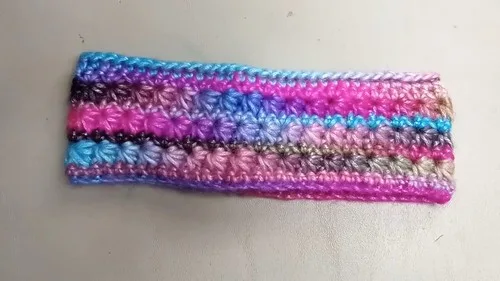
A textured star stitch ear warmer, worked flat and seamed for a hidden join.
- Level
- Intermediate
- Time
- 4-6 hours
- Hook
- 5 mm
- Yarn
- Worsted
Pattern highlights
- Start with a long foundation chain worked in single crochet to create the base row for the ear warmer.
- Turn the work and begin the star stitch, pulling up loops and closing them into single points across the row.
- Follow each star stitch row with a single crochet row that fills the eyes and sets up the next star row.
- Alternate star stitch and single crochet rows until the band reaches the width you want for the finished piece.
- Finish with a plain single crochet row and a slip stitch row for a firm, tidy edge.
- Fold the strip inside out and slip stitch the short ends together through both layers to form a loop.
- Turn the loop right side out and weave in the ends to finish.
About This Pattern
This ear warmer sits in the quick-accessory shelf of my collection, next to the cowls I make when I want texture without a sweater's commitment. It's the kind of piece I reach for between bigger projects, something to keep my hands busy while I decide what's next. The star stitch gives it more presence than a plain band, so it doesn't read as a leftover-yarn project even though it could be one. I like that it asks for one skein and an evening, not a season.
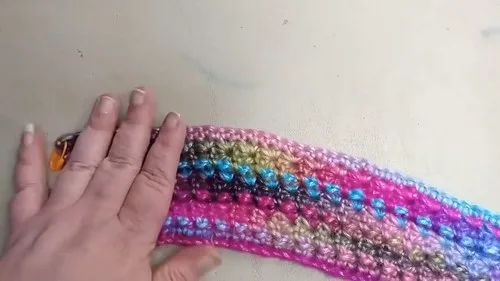
The technique worth noting here is the star stitch itself, built from six loops pulled up and closed together, then finished with a single crochet row that fills each eye with two stitches. The piece starts as a foundation chain worked into single crochet, then turns to star stitch rows worked flat, back and forth, rather than in the round. That flat construction is what lets the star stitch pattern stay legible; working it in a circle would twist the texture out of shape.
Finished, it's a band of star-textured fabric long enough to wrap around the head and seam at the ends, worn like a headband but warmer. The eyes of the star stitch trap air the way a plain single crochet fabric doesn't, which is really the whole point of the design. It sits flat against the head, no bulky closures, just a seamed join hidden under hair. It's a small piece, but it wears like it took more effort than it did.
Worth knowing
The star stitch is the reason to make this. Pulling up six loops and closing them into one point is fussier than a regular stitch, but the rhythm becomes automatic by the second row. What's satisfying is watching the single crochet row afterward fill in the eyes, two stitches per eye, turning a loose lace-like row into something dense and warm. There's also the pleasure of a project with a real beginning and end: a foundation chain, a handful of alternating rows, then a seam. Nothing about it drags. The finishing, slip stitching the ends together inside out, is a neat trick that hides the join completely. For an ear warmer, that matters more than it would on a scarf, since there's nowhere to hide a sloppy seam.
Common mistakes
- Chaining too tightly at the start A snug foundation chain makes it hard to find the second chain for the single crochet base row. Keep the initial chain relaxed so the hook slides through easily.
- Skipping the eye stitch count Each eye of the star stitch needs two single crochets, not one. Miss this and the row comes up short by the next star stitch row.
- Losing the beginning-of-round marker The star stitch rows have no obvious edge to spot on sight. Move the stitch marker up each row so you always know where the round starts.
- Seaming the ends right side out The join is meant to happen while the work is inside out. Seaming it right side out leaves a visible ridge instead of a hidden seam.
- Forgetting to turn between rows The star stitch and single crochet rows are worked flat, turning each time. Skipping a turn twists the texture and throws off the eye placement.
Intermediate
Progress Tracker
0 of 0 rounds
Tap a round to tick it off — your place is saved on this device.
The kit
- Number 4 weighted yarn (e.g., Ice Yarns Picasso or any preferred yarn)
- Darning needle
- Scissors
- Two stitch markers
- 5 mm crochet hook
Main Pattern
Round 1Create a slip knot; use the 5 mm crochet hook to make a foundation chain of 72. If you need to adjust for size, ensure the chain number is even.
Round 2Establishing Base Place a stitch marker to denote the beginning of the round; single crochet into the second chain from the hook; continue single crocheting in each chain until the end of the row, totaling 71 single crochet stitches. (71 sc)
Round 3Starting Star Stitch Chain three, making sure it's loose, and turn the work; use stitch marker at the top of the chain; pull up a loop from the second chain from the hook; continue pulling up loops until you have six loops on the hook, following the pattern as described for the star stitch; yarn over, pull through all six loops, and chain one, this is your first star stitch; continue repeating the star stitch process across the row.
Round 4(Single Crochet Row): Chain one and turn the work; start with a single crochet in the half double crochet stitch from previous row; put a single crochet stitch in the first eye of the star stitch; then, in every eye of the following star stitches, work two single crochets.
Round 5(Repeat Star Stitch Rows): Repeat the process from Round 3 for the star stitches and Round 4 for the single crochet row until the desired number of rows are completed for the ear warmer's width.
Assembly
Step 1Final Rows: After completing the last repeat of the star stitch row, chain one, turn your work, and single crochet across the entire row for a sturdy edge.
Step 2Complete the final row by slip stitching across, giving tension for a better fit.
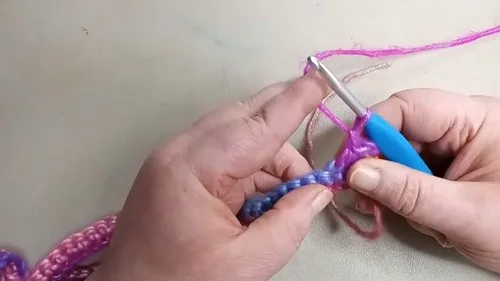
Step 3Finishing: Do not turn the work. Start slip stitching the two ends together while the work is inside out. Be sure to slip stitch through both layers to sew the ends.
Step 4Fasten off the yarn and weave in all the ends securely.
Step 5Final Touch: Flip the work right side out and your ear warmer is complete.
From the collection
Finishing
- Work the final single crochet and slip stitch rows for a firm, non-curling edge before joining.
- the piece still inside out, slip stitch the two short ends together through both layers to close the loop.
- Fasten off, weave in every end, then flip the band right side out for wear.
Why it works
The piece is worked flat, turning at the end of every row, because the star stitch only closes correctly with a wrong-side row between repeats.
Stitch markers track the beginning of the round and the top of the turning chain, since the star stitch rows have no obvious visual edge to spot by eye.
The two ends are joined by slip stitching through both layers while the work is inside out, so the seam sits hidden rather than sitting as a visible ridge.
What it becomes
- Wear it on cold walks in place of a full hat, when ears need cover but hair doesn't.
- Pair it with a wool coat and mittens for a coordinated cold-weather layer.
- Give it as a small, fast-finished gift for someone who thinks hats ruin their hair.
Original pattern: https://crocheteverything.com/crochet-star-stitch-ear-warmer-pattern-for-wintery-time/
FAQ
Can I make this ear warmer wider or narrower?
Yes, add or subtract pairs of chains from the foundation to change the width, keeping the total even. The single crochet base row and star stitch pattern both rely on that even count.
Why is the star stitch worked flat instead of in the round?
Turning at the end of each row keeps the loops and eyes lining up correctly. Working it in the round would distort the star shapes as the fabric curls.
What yarn weight and hook does this pattern call for?
It uses a number 4 weight yarn with a 5 mm hook, per the materials list. Any yarn in that weight works, not just the one named.
How do I keep the seam invisible?
Slip stitch the ends together while the piece is still inside out, going through both layers. Flip it right side out afterward and the join disappears into the texture.