Free Pattern
Step-by-Step
Crochet
Bags & AccessoriesStructured crochet nany bag with elongated double crochet
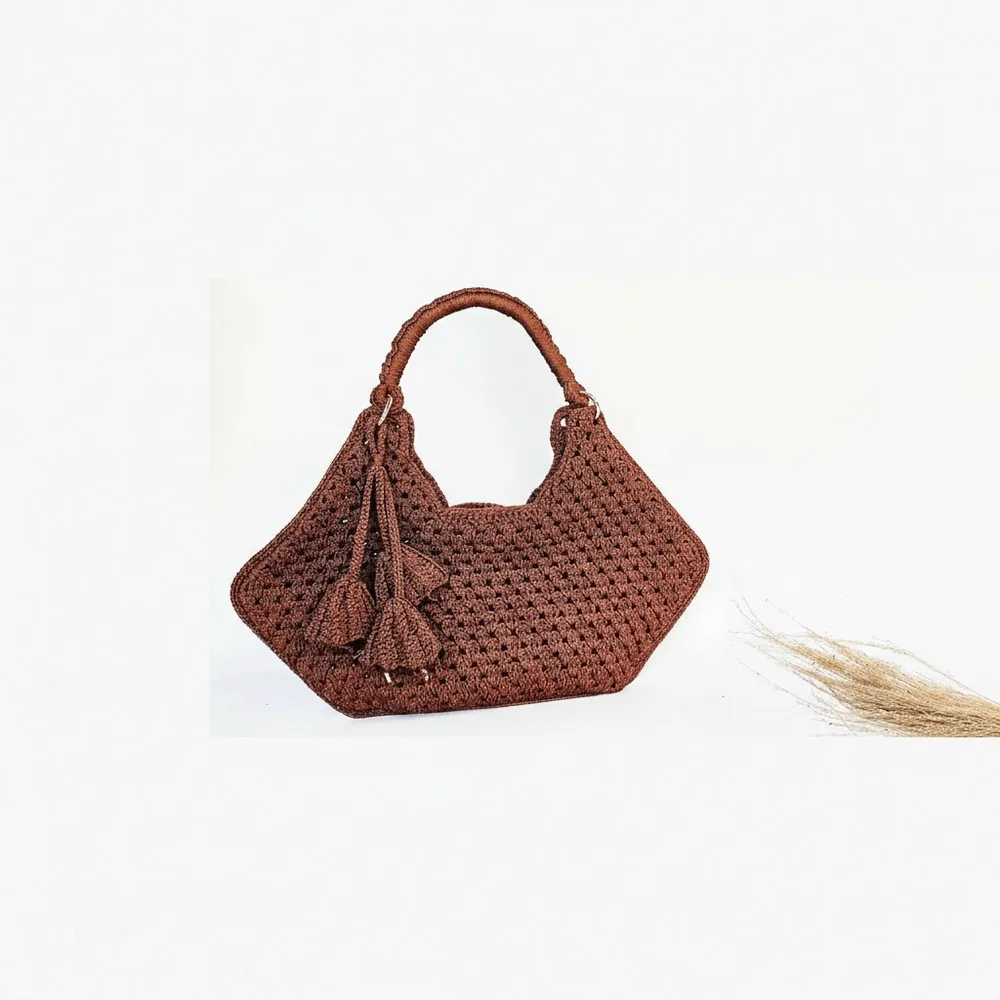
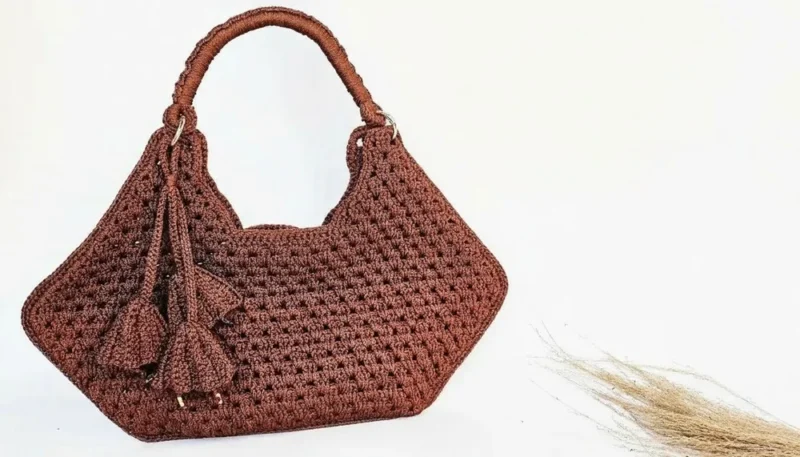
A structured crochet bag built from elongated double crochet blocks and a dense strap.
- Level
- Confident Beginner
- Time
- 4-6 hours
- Hook
- 2 mm
- Yarn
- Fine (2mm polyester)
Pattern highlights
- Start with a long foundation chain and work elongated double crochet blocks across to set the base width.
- Work a run of increase rows, adding one more block to each row as the panel widens.
- Shape the handle notch, then repeat the same construction for the second side of the bag.
- Seam the two panels together to form the finished bag body.
- Make an optional removable pendant and a dense strap, then attach the hinged rings.
- Steam-block every panel before final assembly so the blocks sit even and the shape holds.
About This Pattern
Every collection needs a bag that behaves like a garment accessory, not a craft-fair afterthought. This one sits in that spot. It reads as designer-inspired rather than homespun, which is a hard line to walk in crochet. I like patterns that gamble on structure over softness, and this one bets everything on it.
The whole bag is built from one repeated move: three elongated double crochets worked together into a space, over and over. That single block, stretched taller than a standard dc, gives the fabric its dimension and its stiffness. Add a fine 2 mm polyester yarn and a small 3 mm hook, and the result is dense rather than drapey.
What comes out the other end is a shaped panel bag with a fitted handle notch, a decorative pendant you can swap out, and hinged rings standing in for hardware. It is a bag that wants to hold its own shape on a shelf, not just in your hand.
Worth knowing
The satisfaction here is watching a flat foundation chain turn into a shaped, dimensional panel through nothing but repeated elongated double crochet blocks. Increase rows build the bag wider block by block, then decrease rows pull it back in to carve out the handle notch. It is basic-stitch crochet used with real intention. There's also the finish work: hinged rings and end-cap tricks that make the piece read as store-bought, plus a removable pendant so the bag isn't locked into one look. For a confident beginner, it's a chance to see how far a single stitch, worked deliberately, can take a whole structured object.
Common mistakes
- Working the dc at regular height Elongate every double crochet in the blocks, or the fabric cinches and loses its structured look.
- Chaining between blocks by accident Skip the chain-between step in the foundation row and go straight into the next space, as the pattern specifies.
- Losing count through the increase rows Use stitch markers each row so the one-block increase stays accurate from row 2 through row 11.
- Skipping the marker placement in decreases Place markers at the sixth block on each end so the handle notch lines up on both panels.
- Melting polyester ends carelessly Burn cut ends briefly and at a distance, then press flat before they cool fully.
Confident Beginner
Progress Tracker
0 of 0 rounds
Tap a round to tick it off — your place is saved on this device.
The kit
- 2 mm 100% polyester yarn (approx. 400g; 1 cone = 500g)
- 3 mm crochet hook
- Tapestry needle
- Scissors
- Lighter (for polyester ends)
- Measuring tape
- Stitch markers
- 2 hinged rings (3 cm wide)
- Optional: metallic end caps, button or snap for closure, decorative pendant hardware (as shown, or improvise with other jewelry parts)
Bottom Foundation
Foundation chain: Chain 46 (keep the initial slipknot loose for finishing).
Row 1In the 4th chain from hook, work 3 elongated double crochets (dc) together in the same space (counts as block #1).Skip 2 chains, then 3 elongated dc together in the next chain, repeat until end. You'll have 15 blocks. Do not chain between blocks.
Increase Rows
Rows 2–11Increase rows Turn, ch 3, 2 elongated dc in same base (to make 3 with ch-3), then in each space, 3 elongated dc .At the end, always finish the last block in the top of your turning chain. Each row adds one block (row 2: 16 blocks, row 3: 17…up to row 11: 24 blocks).
Decrease Rows
Rows 12–17Decreases Turn, ch 2, begin right away in the next space (no dc in base), 3 elongated dc in each space across.End row with 2 elongated dc in the last space, then half-finish a final dc in both chain and next block, close together. Continue for 6 rows, ending with 18 blocks, placing markers at 6th block on each end.
Handle/Notch Shaping
Rows 18–23Dividing for handles Continue decreases on each end, working from each outer marker toward the center as before, until you have only 2 blocks left at the top of each handle notch.
Second Side
Make a second, identical piece from step 1 through step 23.
Leave the last yarn end uncut for joining the halves.
Seaming the Bag
Lay both panels “wrong side” to “wrong side” (the single crochet border determines right/wrong side).
Join with single crochet all the way around the outer edge, aligning stitch for stitch. Work 3 sc at each corner for a rounded look.
Weave in all yarn tails; for polyester, seal with a lighter.
Pendant (Optional, but recommended!)
Flower Motif (make 3 in varied colors):
Ch 12. Work slip stitches, single crochet, half-dc, dc, treble, and elongated treble stitches as follows: In each chain: sl st 2x, sc 2x, hdc 3x, dc 3x, tr 2x
In each row , always work in BACK LOOPS ONLY for ribbing effect.
Turn, ch 3, repeat matching stitch heights: elongated tr into tr, tr into tr, etc.
Work 11 rows total per motif.
Form each flower: With tapestry needle, sew row ends together to form a circle.
Weave in ends and heat-seal if desired.
Pendant Cord: Create a chain cord (90 chains for two flowers, 30 chains for third flower).
Slip stitch back along cord (using back loop of each chain for structure).
Attach flowers at staggered heights using tapestry needle and secure well.
Attach Pendant: Secure pendant to bag ring using tapestry needle or included hardware.
Strap
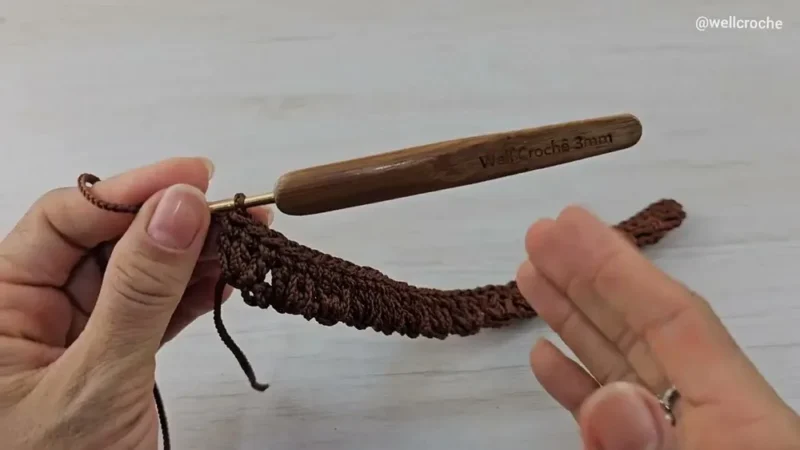
Wrap 20 turns of yarn loosely around a 30 cm ruler or notebook. Mark the center and ends for alignment.
At the center, insert your crochet hook and create single crochet stitches along the length (about 15 sc per side for strap ends).
Once the centers are joined, continue adding sc tightly over both sides for the entire length (about 103 sc in sample) for a sturdy, rounded strap.
Heat-seal yarn ends.
Attach strap to bag using hinged rings.
Assembly
Step 1Steam-block panels before assembly for a polished result.
Step 2Add a button or snap if desired for closure.
Step 3Attach all hardware, burn remaining ends, and gently brush to remove excess lint.
From the collection
Finishing
- Weave in and burn every polyester end with the lighter before assembly, since these fibers won't felt shut.
- Steam-block both panels first, letting the elongated blocks even out and the notch hold its shape.
- Seam the panels, attach the strap and hinged rings, then brush the surface to clear leftover lint.
- If you're using metallic or gold hardware, apply a coat of clear nail polish before assembly. This helps prevent tarnishing and keeps your bag looking new for longer.
Why it works
The increase rows add exactly one block per row, so the widening happens gradually rather than all at once.
The decrease rows taper the same way in reverse, which is what shapes the handle notch into the panel.
The bag is worked flat in two matching side panels, then joined by seaming rather than crocheted in one piece.
What it becomes
- An everyday shoulder bag for phone, wallet, and keys, paired with simple outfits that want a structured accent.
- A statement accessory for a night out, where the pendant can be swapped to match jewelry.
- A gift-worthy handmade bag for someone who prefers polished, tailored crochet over soft amigurumi pieces, or a piece to sell at craft fairs.
Original pattern: https://redagapeblog.com/fashionable-crochet-nany-bag-pattern/
FAQ
Why does the pattern insist on elongating every double crochet?
A standard-height dc lets the blocks cinch inward, distorting the panel. Elongating keeps the fabric flat and the finished bag structured.
Can I skip blocking the panels?
I wouldn't. Steam-blocking evens out the block stitches and helps the handle notch hold its shape before seaming.
Is the pendant necessary to finish the bag?
No, it's listed as optional. It's removable and meant for customizing the look, not for structural finishing.
What do the hinged rings actually do?
They act as the connection point between the strap and the bag body, standing in for purchased bag hardware.