Free Pattern
Step-by-Step
Crochet
BlanketsRibbed and textured throw blanket crochet pattern
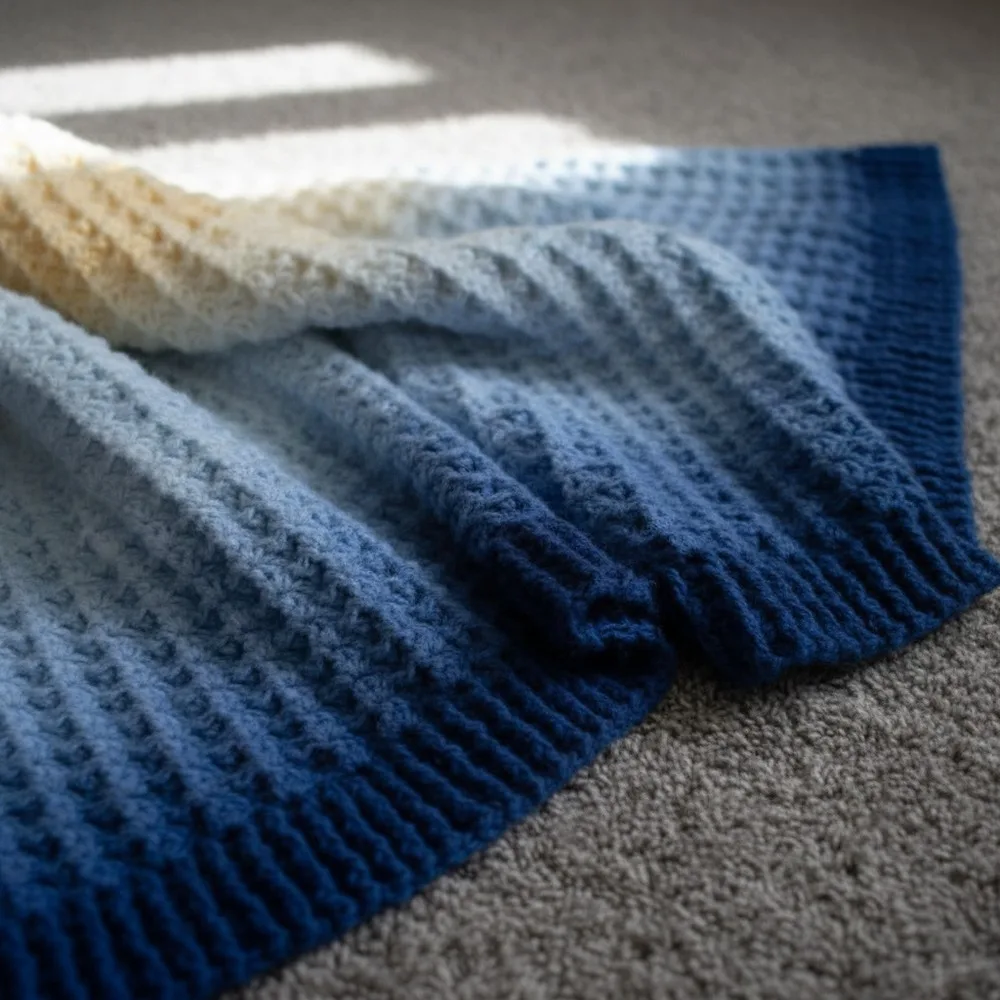
A textured throw with double crochet ribbing worked flat in rows for a cozy finish.
- Level
- Intermediate
- Time
- 10-15 hours
- Hook
- 5.0 mm
- Yarn
- Worsted
Pattern highlights
- Start with a long foundation chain sized to the blanket's finished width.
- Work a double crochet row into that chain to set the stitch count for the rest of the piece.
- Turn and begin the ribbed pattern, alternating front post and back post double crochet across each row.
- Repeat that ribbing row for the bulk of the blanket, using stitch markers to keep first and last stitches consistent.
- Measure periodically as you near your target length so you can adjust before starting the final rows.
- Finish with ribbing rows to bookend the textured section, mirroring the opening structure.
About This Pattern
Every collection needs a blanket that earns its shelf space, and this one does. It sits between simple garter throws and fussier cabled ones. The ribbed border does the heavy lifting for polish, while the body keeps the hook moving without much fuss. I like patterns that look harder than they are.
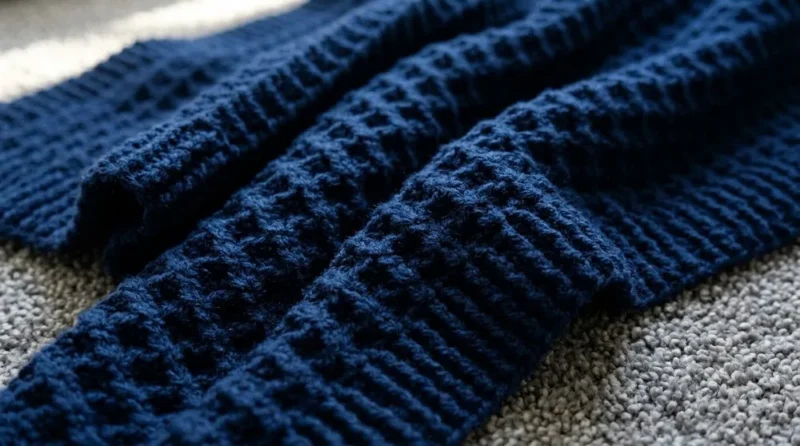
The technique here is post stitch ribbing: front post and back post double crochet worked in an alternating pattern. That fpdc/bpdc rhythm is what gives the edges their crisp, corrugated look. It is a small technique with a big visual payoff, and it repeats enough rows that your hands learn it fast.
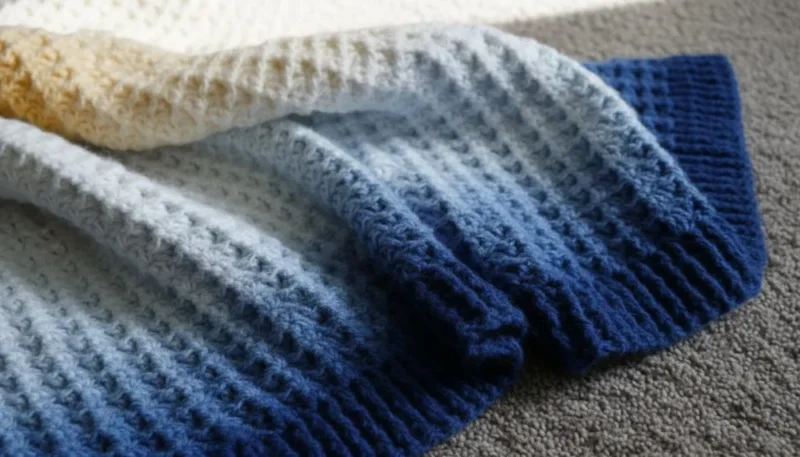
The finished piece is a rectangular throw, worked flat in rows with a chain foundation. The double crochet ribbing frames a textured interior, so the eye reads structure first and softness second. It is the kind of blanket that photographs well folded over a couch arm.
Worth knowing
The satisfaction here is rhythm. Once the fpdc/bpdc sequence clicks, row two and beyond move in a steady, almost meditative pattern. The double crochet ribbing gives the whole piece a tailored edge, which is rare in a blanket this straightforward. Working with self-striping cake yarn adds a second layer of interest, since the color shifts happen without any extra effort from you. I also like that this is a flat, row-based build rather than a granny-square assembly. No seaming, no square-counting, just a long chain and a lot of consistent rows. It rewards patience more than skill, which makes it a good project for evenings when you want to make progress without thinking too hard about the next move.
Common mistakes
- Misreading fpdc versus bpdc direction Insert the hook from front to back for fpdc and back to front for bpdc. Check the stitch after every few reps until it feels automatic.
- Losing the edge stitch count Place a stitch marker in the first and last stitch of each row before you turn. Recount if a marker seems to have drifted.
- Ignoring the ch-1 turning rule Remember the ch-1 does not count as a stitch in this pattern. Work your hdc directly into the first stitch, not into the chain.
- Not planning cake color changes Decide in advance whether you start each new cake from its center or outside pull. Alternating deliberately keeps the gradient graceful instead of accidental.
- Skipping length checks near the end Measure the piece before starting the closing ribbing rows. It is easier to add a row now than to unravel finished ribbing later.
Intermediate
Progress Tracker
0 of 0 rounds
Tap a round to tick it off — your place is saved on this device.
The kit
Yarn
- Karen Cloud Cakes (4 cakes for a 50″ x 52″ blanket; approx. 720 yds per cake; shown in “Golden”). This is a soft polyester yarn.
Hook
- 5.0 mm (US H/8)
Notions
- Yarn needle for weaving in ends, scissors, measuring tape
Optional
- Stitch markers to track repeats or note corners if adjusting size.
Pattern
Special Notes: The starting chain for the full-size blanket is 199 ch for approx. 50″ width. Blanket length is 52″ (you may easily adjust by adding repeats). To resize: chain any multiple of 4 + 3. Blanket is worked in rows. For gradient color changes: start the first cake from the center, next cake from the outside, and alternate for each subsequent cake. Instructions are written for the large blanket; stitch counts are given for clarity.
Foundation/Row 1Ch 199 (or as desired: multiple of 4 + 3). Dc in 4th ch from hook (counts as first dc), dc in each ch across. (197 sts including turning ch)Ch 1, turn.
Row 2Hdc in first st (ch-1 does not count as a st). [ Fpdc around next st, bpdc around next st] ; rep from * to * across to last st (which is the top of beginning ch).Hdc in last st.Ch 1, turn.
Row 3Hdc in first st. [ Bpdc around next st, fpdc around next st] ; rep from * to * across to last st.Hdc in last st.Ch 1, turn.
Rows 4–7Rep Rows 2 & 3 two more times (for a total of 7 rows of ribbing).
Main Blanket Body
Row 8Set-up Row Sc in first st, Skip next st, 3 dc in next st, skip next st, sc in next st ;Rep from * to * across, ending with sc in last st.Ch 1, turn.
Row 92 dc in first st, Skip next st, fpsc around next st, skip next st, 3 dc in next sc ;Rep from * to * across, finishing with: skip next st, fpsc around next st, skip next st, 2 dc in last st.Ch 1, turn.
Row 10Sc in first st, Skip next st, 3 dc in next sc, skip next st, fpsc around next st ;Rep from * to * across, ending with sc in the last st.Ch 1, turn.Blanket Body Repeat
Rows 9–10Continue repeating Rows 9 & 10 until work measures approx. 49.5 inches from the start (or desired length).
Ending Ribbed Edging
End Row 1Dc in first st, dc in every st across.Ch 1, turn.
End Row 2Hdc in first st, [ Fpdc around next st, bpdc around next st] , repeat across.Hdc in last st.Ch 1, turn.
End Row 3Hdc in first st, [ Bpdc around next st, fpdc around next st] , repeat across.Hdc in last st.Ch 1, turn.Repeat the last two rows (the ribbing sequence) until you have 6 rows of ribbing at the end to match the beginning.Finish: Fasten off and weave in all ends.
Pattern Correction
For a swatch: Chain any multiple of 4 + 3 (as in the sample, ch 31 for a small swatch).
When beginning or ending a ribbed section, always place an hdc in the first and last st for a neat edge.
Ensure to count stitches to prevent unintentional increases/decreases.
Tips
To create neat and consistent ribbing, always insert your hook correctly for fpdc/bpdc (post stitches).
If using self-striping yarn, alternate starting from the center and outside of each cake for graceful color gradients.
Measure as you go, especially when approaching the final length, to ensure your blanket meets your size requirements before starting the ending ribbing.
Use a stitch marker in your first and last stitch of each row for clear, straight edges.
Conclusion
This blanket combines rich texture, simple construction, and beautiful color changes for a show-stopping yet cozy crochet blanket. The double crochet ribbing perfectly frames the textured interior, and your yarn choice will bring it all together.
From the collection
Finishing
- Weave in the ends left from each new cake of yarn as you change skeins, not just at the very end.
- Block the finished blanket flat to even out the tension between the ribbed sections and the textured rows.
- Trim any remaining tails close to the fabric once blocking has set the stitches in place.
Why it works
The piece is worked flat in rows off a single starting chain, not in the round, which keeps the ribbing lines running straight and vertical.
Row 1 sets the stitch count with a straightforward double crochet row, giving every following row a stable base to alternate stitches against.
The fpdc/bpdc alternation in row 2 onward is what creates the ribbed texture; each post stitch pair repeats across the row to keep the pattern unbroken edge to edge.
What it becomes
- Drape it over a couch for everyday texture, paired with plain linen throw pillows so the ribbing stays the focal point.
- Keep it at the foot of a bed as an extra layer, especially nice against smooth cotton sheets.
- Pack it for outdoor picnics, since the sturdy double crochet ribbing holds up to being folded and unfolded on grass.
Original pattern: https://redagapeblog.com/enjoy-free-crochet-blanket-pattern/
FAQ
How many cakes of yarn do I actually need?
The pattern calls for four cakes to reach the finished 50 by 52 inch size. If you are adjusting the size, plan yardage against the approximate 720 yards per cake.
Can I use a different fiber than polyester?
The sample uses a soft polyester cake yarn, but the stitch pattern itself does not depend on fiber content. Just match the 5.0 mm hook to whatever worsted-weight yarn you choose.
Why does row 2 specify that the ch-1 doesn't count as a stitch?
That detail keeps your stitch count accurate across the ribbed rows. If you count the ch-1 as a stitch by mistake, the edge will slowly grow or shrink.
What if my gauge runs different from the sample?
Measure as you go rather than trusting the row count alone, especially as you approach your target length. This pattern is flexible that way since it is worked flat in rows.