
Free Pattern
Step-by-Step
Crochet
AmigurumiTiny amigurumi cat keychain crochet pattern
A pocket-sized amigurumi cat keychain worked in fine yarn with a 1.5 mm hook.
- Level
- Intermediate
- Time
- 4-6 hours
- Hook
- 1.5 mm
- Yarn
- Fingering
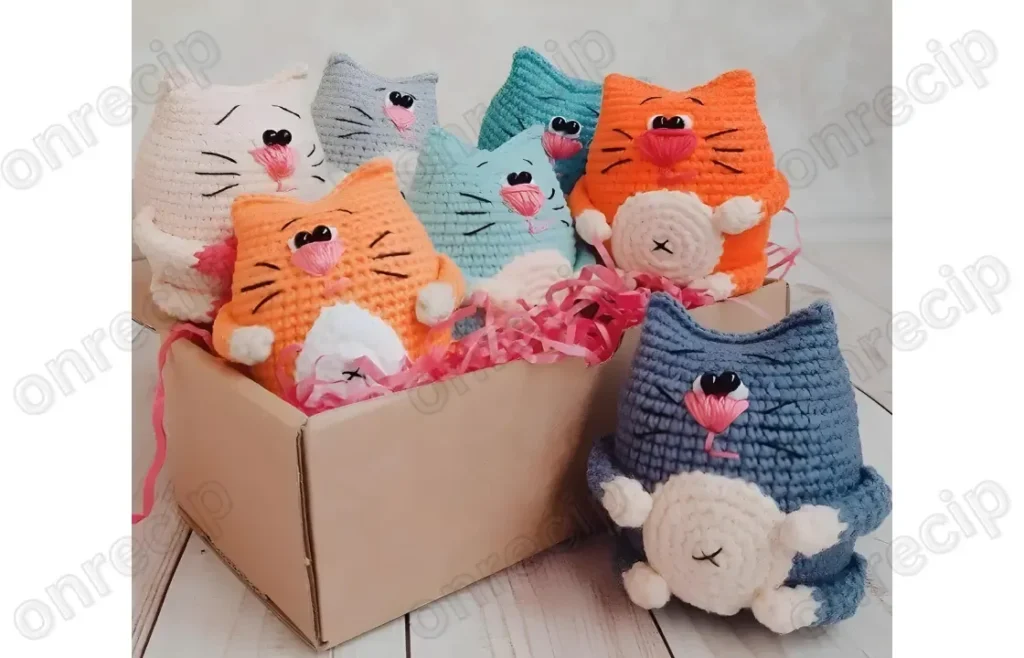
Pattern highlights
- Start the body-head at a magic ring and increase steadily to shape the rounded face and body in one piece.
- Work the remaining rounds even, no more shaping, letting the cylinder taper naturally toward the top.
- Stuff the body-head with fiberfill before closing the top opening, then fasten off with a long tail.
- Fold each limb flat at the top and single crochet through both layers to close it instead of stuffing it.
- Attach beads for eyes, embroider the nose, eyebrows and whiskers, then sew the limbs to the body.
- Finish by securing a thread cord key holder through the loop left at the top of the head.
About This Pattern
I keep a shelf of small things that outgrew their original purpose — a bag charm here, a bowl of orphaned amigurumi there. This cat belongs on that shelf. It is built at keychain scale, which changes how a piece behaves on the hook. Every decision gets smaller and more deliberate. There is no room for a sloppy round when the whole animal fits in your palm.
What comes off the hook is a single stuffed cat, head and body joined as one shape, with four limbs attached afterward and a cord ready for a bag or a set of keys. It is small enough to finish in an evening and sturdy enough to survive a pocket. I like that about it — no fragile parts, just fiber and a bit of fill.
Worth knowing
There is something satisfying about working this small. The 1.5 mm hook forces a slower, steadier rhythm than a standard amigurumi, and every stitch shows. I like watching the increase pattern build the head's curve round after round — one sc, inc, repeat, and suddenly there's a face shape. The limbs are a neat little exercise too: a plain tube in white, a color change partway through, then folding the tube flat to close it with three stitches instead of a drawn-up hole. It is a pattern that rewards attention without demanding hours. By the time the beads go in for eyes and the floss marks whiskers, the cat has more personality than its size suggests. That contrast — tiny piece, real character — is the whole appeal.
Common mistakes
- Losing stitch placement on a 1.5 mm hook Work under good light and count stitches at the end of every round. The small gauge hides mistakes until several rounds later.
- Overstuffing the body-head Add fiberfill in small pinches and check the shape against the increase pattern as you go. Too much fill distorts the rounded shaping from the early rounds.
- Stuffing the arms and legs anyway Leave these pieces unstuffed as instructed. They are meant to stay flat once folded and closed, not rounded.
- Rushing the folded closure on limbs Line up both layers evenly before single crocheting through them. A crooked fold leaves a visible gap at the tip of the limb.


Intermediate
Progress Tracker
0 of 0 rounds
Tap a round to tick it off — your place is saved on this device.
The kit
- YarnArt Jeans yarn (55% cotton, 45% acrylic, 50 g/160 m)
- 1.5 mm crochet hook
- YarnArt IRIS yarn for embroidery nose
- 3 mm beads for eyes
- Sewing thread for sewing eyes
- Embroidery floss for eyebrows and whiskers
- Sewing needle and scissors
- Fiberfill
- Thread cord key holder
Body-head
Stuff with fiberfill before closing the top opening.
Fasten off and leave a long tail for making a loop.
Round 16 sc in magic ring. (6)
Round 2(inc) repeat 6 times. (12)
Round 3(1 sc, inc) repeat 6 times. (18)
Round 4(2 sc, inc) repeat 6 times. (24)
Round 5(3 sc, inc) repeat 6 times. (30)
Round 6(4 sc, inc) repeat 6 times. (36)
Round 7(5 sc, inc) repeat 6 times. (42)
Round 8(6 sc, inc) repeat 6 times. (48)
Rounds 9–2148 sc (13 rounds).
Round 22(6 sc, dec) repeat 6 times. (42)
Round 2342 sc.(42)
Round 24(5 sc, dec) repeat 6 times. (36)
Rounds 25–2936 sc (5 rounds).
Round 30Fold the top opening flat and 18 sc through both sides. (18)
Arms and legs
Make 4Work rounds 1-3 with white color.
Change to main color for rounds 4-9.
Do not stuff with fiberfill.
Fasten off and leave a long tail for sewing.
Round 16 sc in magic ring. (6)
Rounds 2–36 sc (2 rounds).
Rounds 4–96 sc (6 rounds).
Round 101 ch, fold the top opening flat and 3 sc through both sides. (3 sc)
Finishing
- Weave in the starting tail on each piece before you begin assembly, so nothing works loose later.
- Stuff the body-head firmly but evenly before closing the top opening, checking the shape stays round, not lumpy.
- Sew the four limbs to the body, then attach the thread cord key holder through the fastened-off loop at the top.
Why it works
The body-head is a single piece worked in one continuous spiral, so there is no seam between face and body.
Increases are spaced one stitch further apart each round in the early rounds, which is what rounds the head outward before the later rounds settle into straight sides.
The limbs are closed by folding the tube flat and single crocheting through both sides, a flat seam instead of a gathered hole, which is why they stay unstuffed.
What it becomes
- Clip it to a backpack zipper alongside other small amigurumi charms for a mismatched collection.
- Hang it from a set of house keys as a quick way to find them in a bag.
- Give it as a small handmade addition to a larger gift, paired with a keyring or lanyard.
Original pattern: https://onrecip.com/amigurumi-cat-keychain-free-pattern/
FAQ
Why use such a small hook for this pattern?
The 1.5 mm hook keeps the stitches tight, which matters at keychain scale. A larger hook would leave gaps the fiberfill could show through.
Do the arms and legs need stuffing?
No, the pattern specifically says not to stuff them. They are closed flat by folding the top and single crocheting through both sides.
Can I skip the embroidery floss details?
You could, but the whiskers and eyebrows are what give the face its expression. The nose embroidery and bead eyes do most of the character work too.
How is the cord attached at the end?
The pattern leaves a long tail after fastening off the body-head, which forms the loop for the thread cord key holder. It is not a separate step after sewing.