Free Pattern
Step-by-Step
Crochet
Home DecorA turtle coaster crochet pattern with legs and head
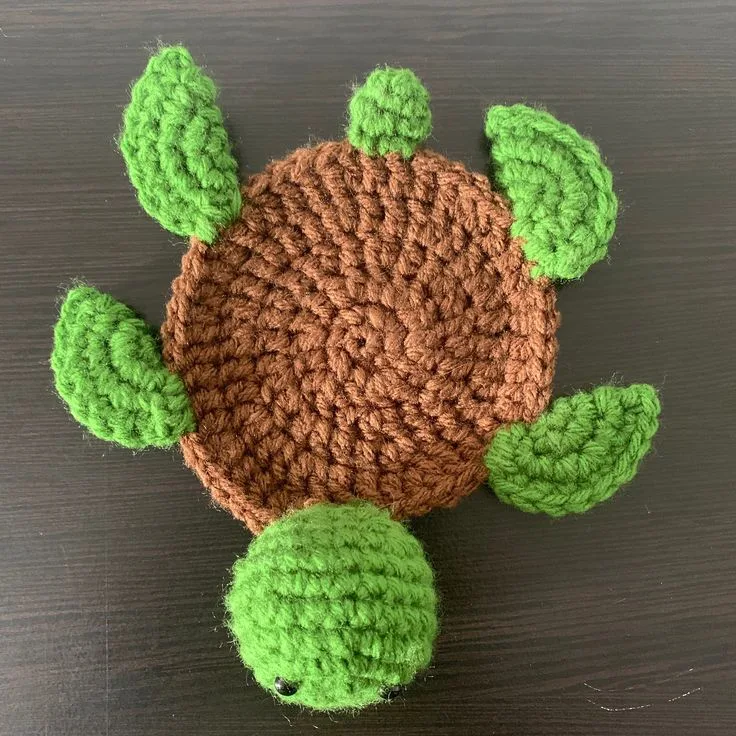
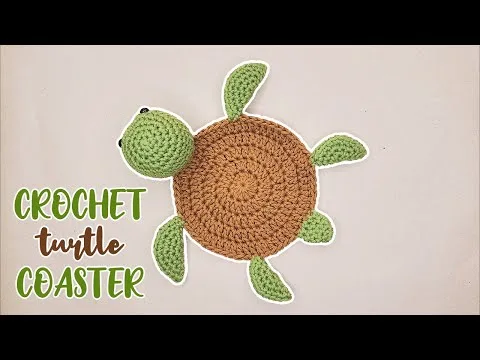
A single-round turtle coaster pattern with legs, head, and tail, made in cotton crochet.
- Level
- Beginner
- Time
- 1-3 hours
- Hook
- 4 mm
- Yarn
- Worsted
Pattern highlights
- Start the shell with a magic ring, then build the round base outward in single crochet increases.
- Watch the base spread from a tight center into a flat circle, wide enough for a coaster.
- Chain and join four small loops for legs, then single crochet around each one.
- Work the head flat as a short strip, turning to crochet back across it.
- Attach the legs evenly around the body, then add the head and tail.
- Weave in every end so the finished coaster lies flat under a mug.
About This Pattern
A turtle coaster sits in the small-and-useful corner of my collection, next to flat fruit motifs and tiny baskets. It is not a toy, not quite home decor either. It is a single round base with just enough shape added on top to read as an animal. I keep a few of these on hand for gift bags, because they finish fast and use up leftover cotton. This one earns its spot by being both a coaster and a small creature.
The body starts in a magic ring, then grows through a few rounds of single crochet increases, spreading evenly until it reads as a circle. The legs are their own small loops, chained and joined, then single crocheted around before being sewn on. The head is worked flat, a short strip turned and crocheted back across. None of it is hard. It is just a lot of small, separate pieces that only become a turtle once you start attaching them.
What comes off the hook is a flat, round coaster with a head, tail, and four little legs peeking out from under the shell. It sits under a mug without complaint and holds its shape once the ends are woven in. Cotton yarn gives it enough body to actually catch drips, which matters more than the cute factor. Make a few in different colors and they read as a small family, lined up on a shelf between uses.
Worth knowing
The satisfaction here is in the assembly, not just the stitching. Working the round base in single crochet, increasing evenly, gives that clean spiral disc every coaster needs. Then there is a small puzzle: four legs to make identically, a head worked flat and turned, a tail to place. Getting them balanced around the body is the fussy, fun part. It is a project small enough to finish in one sitting, but with enough separate pieces to keep my attention. And at the end I have something that actually gets used, not just admired on a shelf. Cotton yarn does the practical work; the shape does the charm.
Common mistakes
- Losing the increase pattern Losing track of which stitch gets the increase throws off the flat circle. Use a stitch marker at the start of each round to stay oriented.
- Legs made unevenly Four legs crocheted without checking each other can end up different sizes. Lay them side by side before attaching so the turtle stands level.
- Base cupping instead of flat A base that curls upward usually means the increases fell behind. Space them evenly around the round so it relaxes flat again.
- Head strip flares at the turn The head can flare where you turn to crochet back across. Keep tension even on that first stitch after turning to keep the strip straight.
- Skipping a tight magic ring Leaving the magic ring loose shows a visible hole at the center. Cinch it closed fully before working the first round.

Beginner
Progress Tracker
0 of 0 rounds
Tap a round to tick it off — your place is saved on this device.
The kit
Yarn
- Cotton yarn is ideal because it’s durable and absorbent. Choose colors like green, brown, or even bright shades for a fun twist.
Crochet Hook
- Typically, a size 4mm (G/6) or 5mm (H/8) hook works well for coasters.
Yarn Needle
- For weaving in ends.
Scissors
- To trim excess yarn.
Stitch Markers
- Optional but helpful for keeping track of your rounds.
Pattern
- Choose from free or paid patterns online or create your own design.
Body (Round Base)
Magic Ring: Start with a magic ring and crochet 6 single crochets (sc) into the ring.
Round 12 sc in each stitch around (12 stitches).(12)
Round 21 sc, 2 sc in the next stitch , repeat around (18 stitches).(18)
Round 32 sc, 2 sc in the next stitch , repeat around (24 stitches).Continue: Repeat this pattern, increasing the stitches as needed, until the circle is the desired size for a coaster.(24)
Legs (Make 4)
Chain 4 and slip stitch into the first chain to form a loop.
Single crochet around the loop (8 stitches).
Attach the legs evenly around the body.
Head
Chain 6, turn, and single crochet back across.
Attach the head to the top of the body.
Tail
Chain 3, turn, and slip stitch back across.
Attach to the bottom of the body.
Finish
Fasten off and weave in all ends.
From the collection
Finishing
- Weave in the ends on the body and on each small piece before assembly.
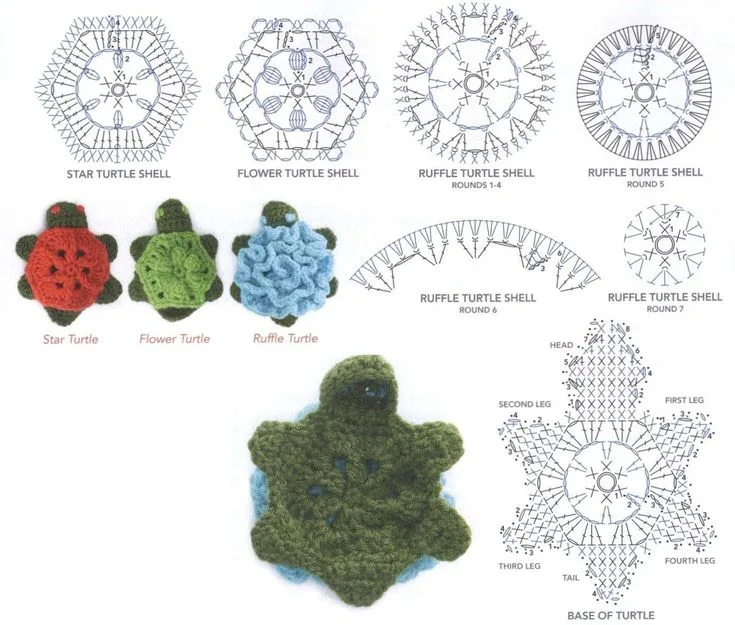
- Attach the four legs evenly around the underside of the body so the turtle sits level.
- Sew on the head and tail last to complete the shape and trim any remaining yarn.
Why it works
Each round of the body adds one more plain stitch between increases, which keeps the circle flat instead of cupping.
The legs are worked as small closed loops rather than shaped pieces, which keeps four identical parts simple to repeat.
The head is worked flat and turned instead of in the round, since a short strip needs no shaping to read as a neck.
What it becomes
- Set a few under mismatched mugs on a coffee table, since bright colors mix well together.
- Line several up as the elements of a small garland for a wall hanging.
- Use smaller versions as cup coasters at a casual gathering, paired with plain stoneware.
Original pattern: https://crochetblog.net/turtle-coaster-crochet-ideas/
FAQ
Can I use a smaller hook for a tighter coaster?
Yes, sizing down slightly makes a firmer, smaller disc. Just keep the same stitch and increase pattern going.
Why does cotton yarn work better than acrylic here?
Cotton has more body and actually absorbs moisture, which is the coaster's job. Acrylic tends to slide and stays slippery under a mug.
Do the legs need any stuffing?
No, the legs are small single crochet loops with no stuffing called for. They hold their shape from the stitches alone.
How do I keep the four legs evenly spaced?
Fold the body lightly into quarters before pinning the legs to mark placement. Even spacing keeps the turtle looking balanced from above.